Charging Your BioSleeve
Before you can start setting up your BioSleeve, you’ll need to make sure it’s fully charged. Here’s how:
Setting up your Charger
1. Find a flat surface in your home with an electrical outlet nearby, such as a kitchen or bathroom countertop or on the floor near a wall.
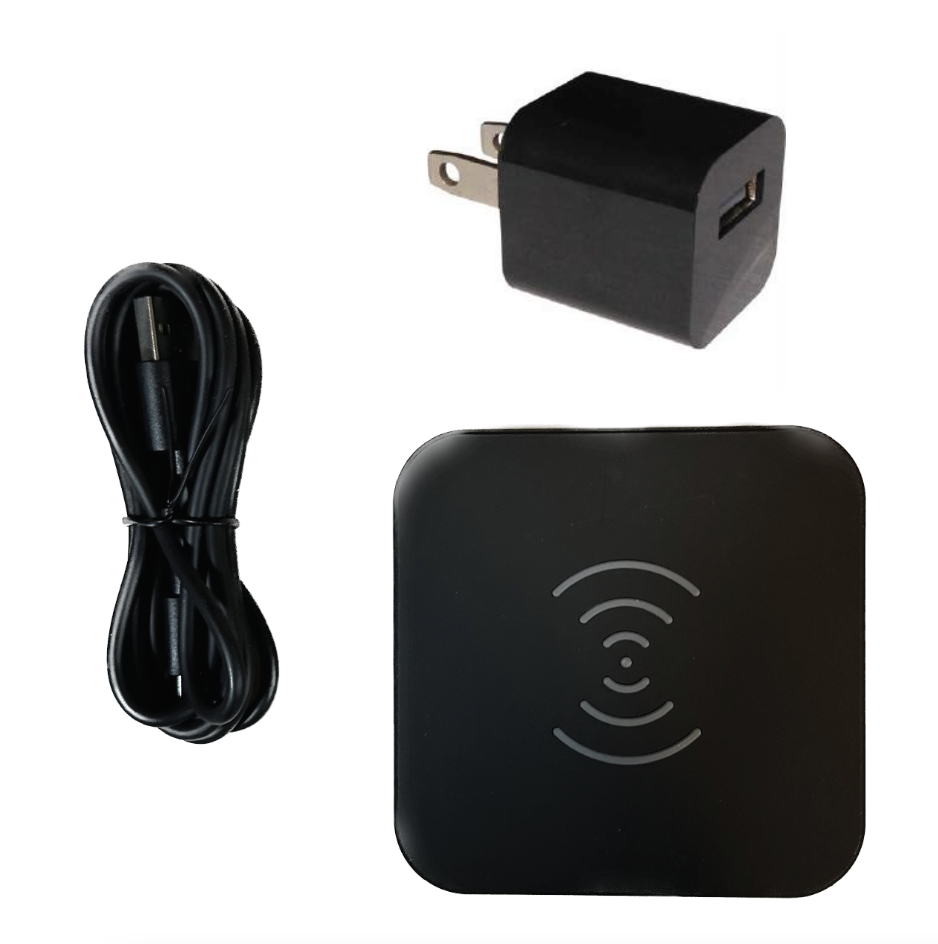
2. Locate the inductive charging pad, cord, and wall plug you received in the mail or from your treatment team:
3. Plug the small end of the charging cord into the charging pad, as pictured here:

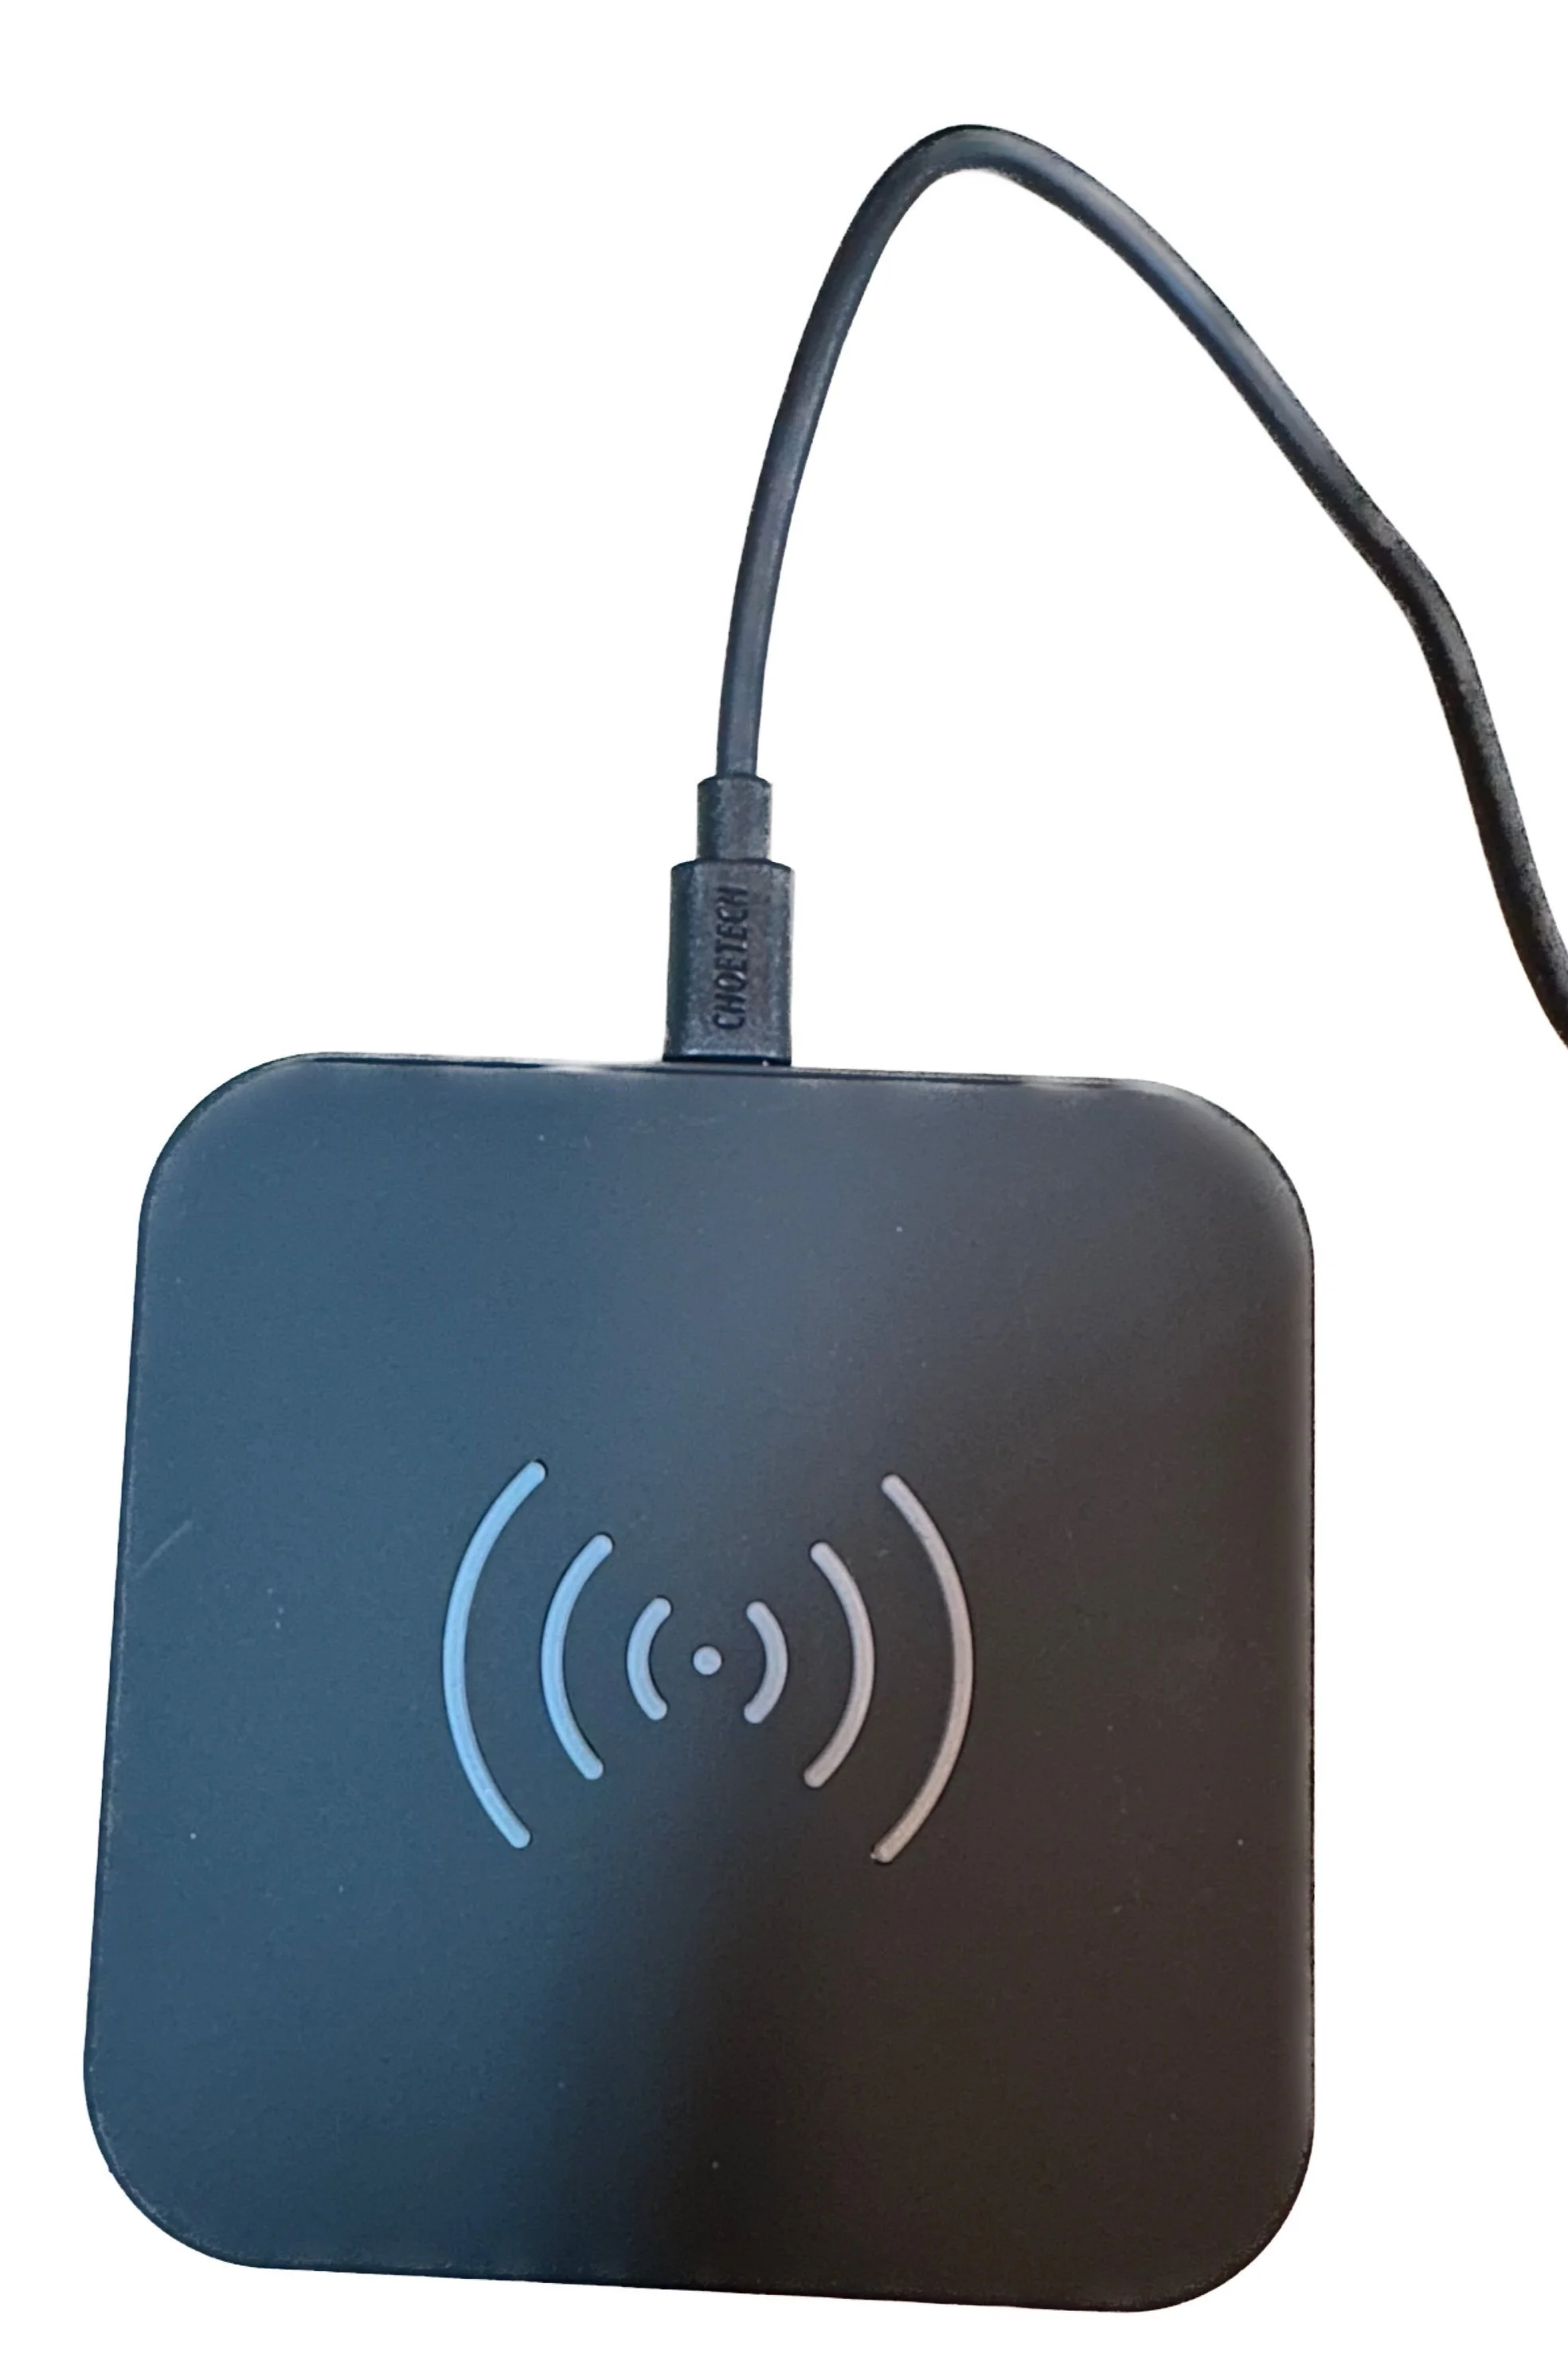
4. Plug the large end of the charging cord into the wall plug, as pictured here:


5. Set the charging pad on the flat surface you identified in Step 1 and insert the wall plug into the electrical outlet.
Folding your Arm BioSleeve for Charging
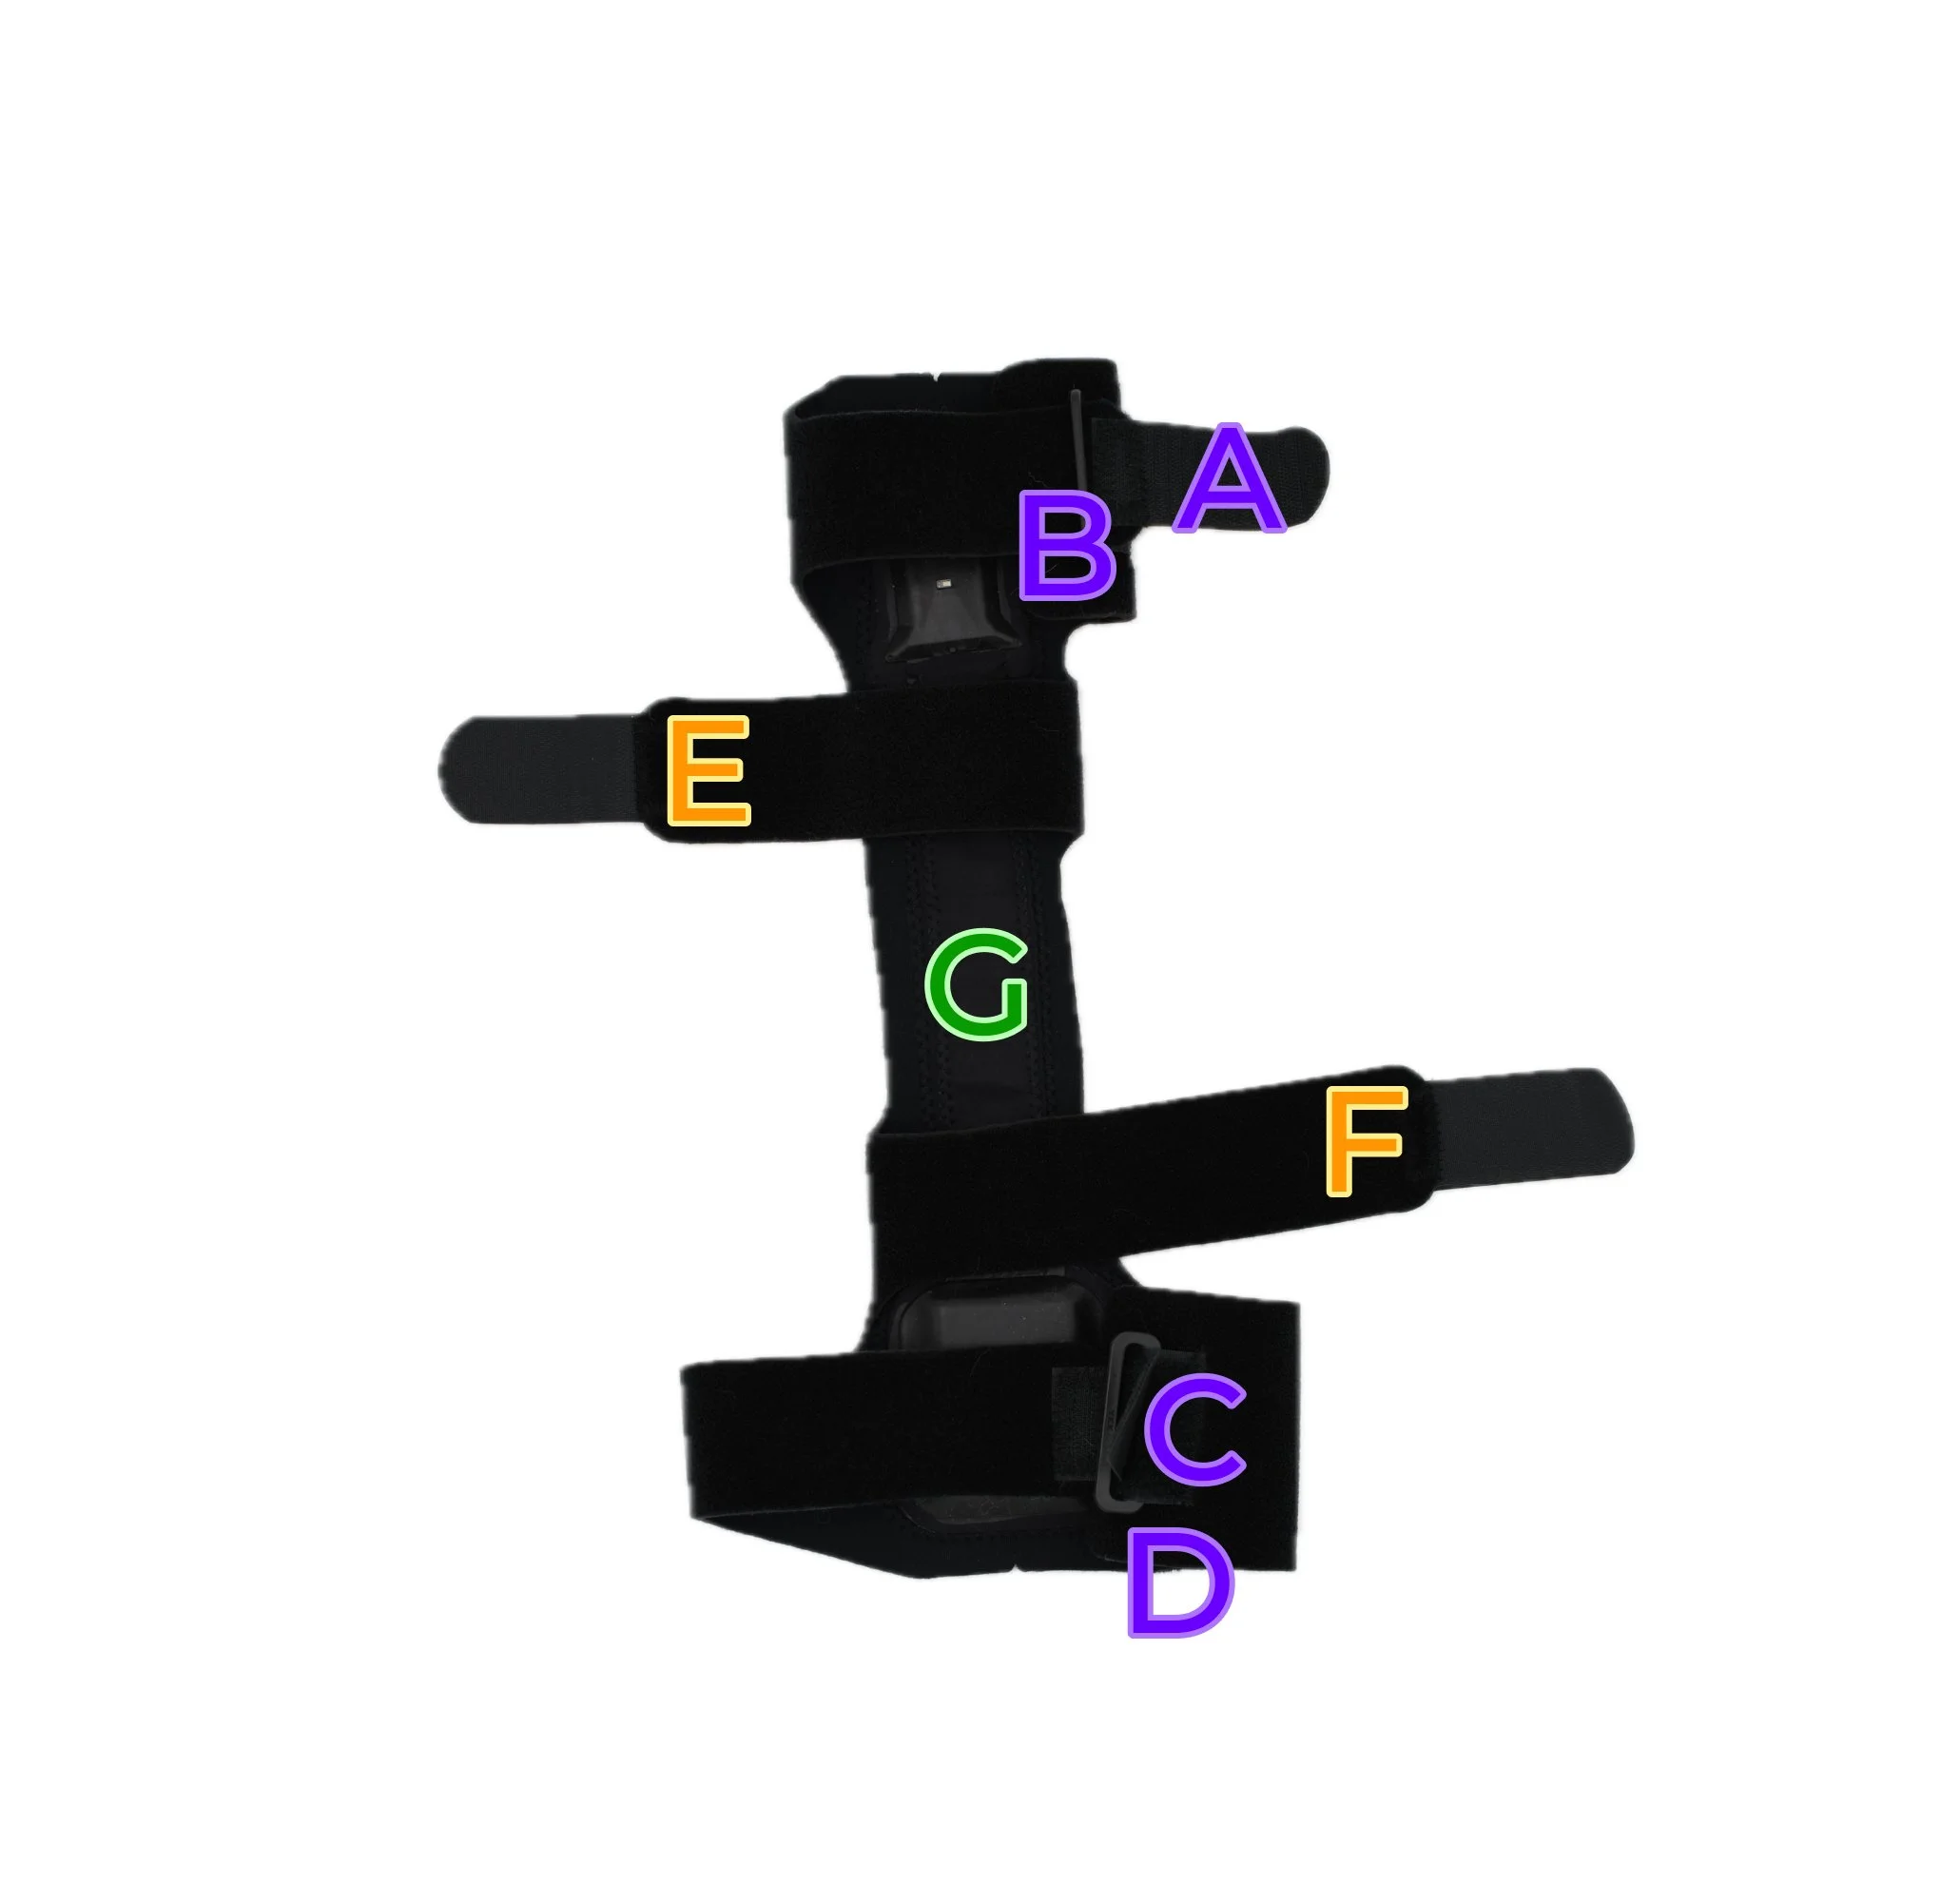
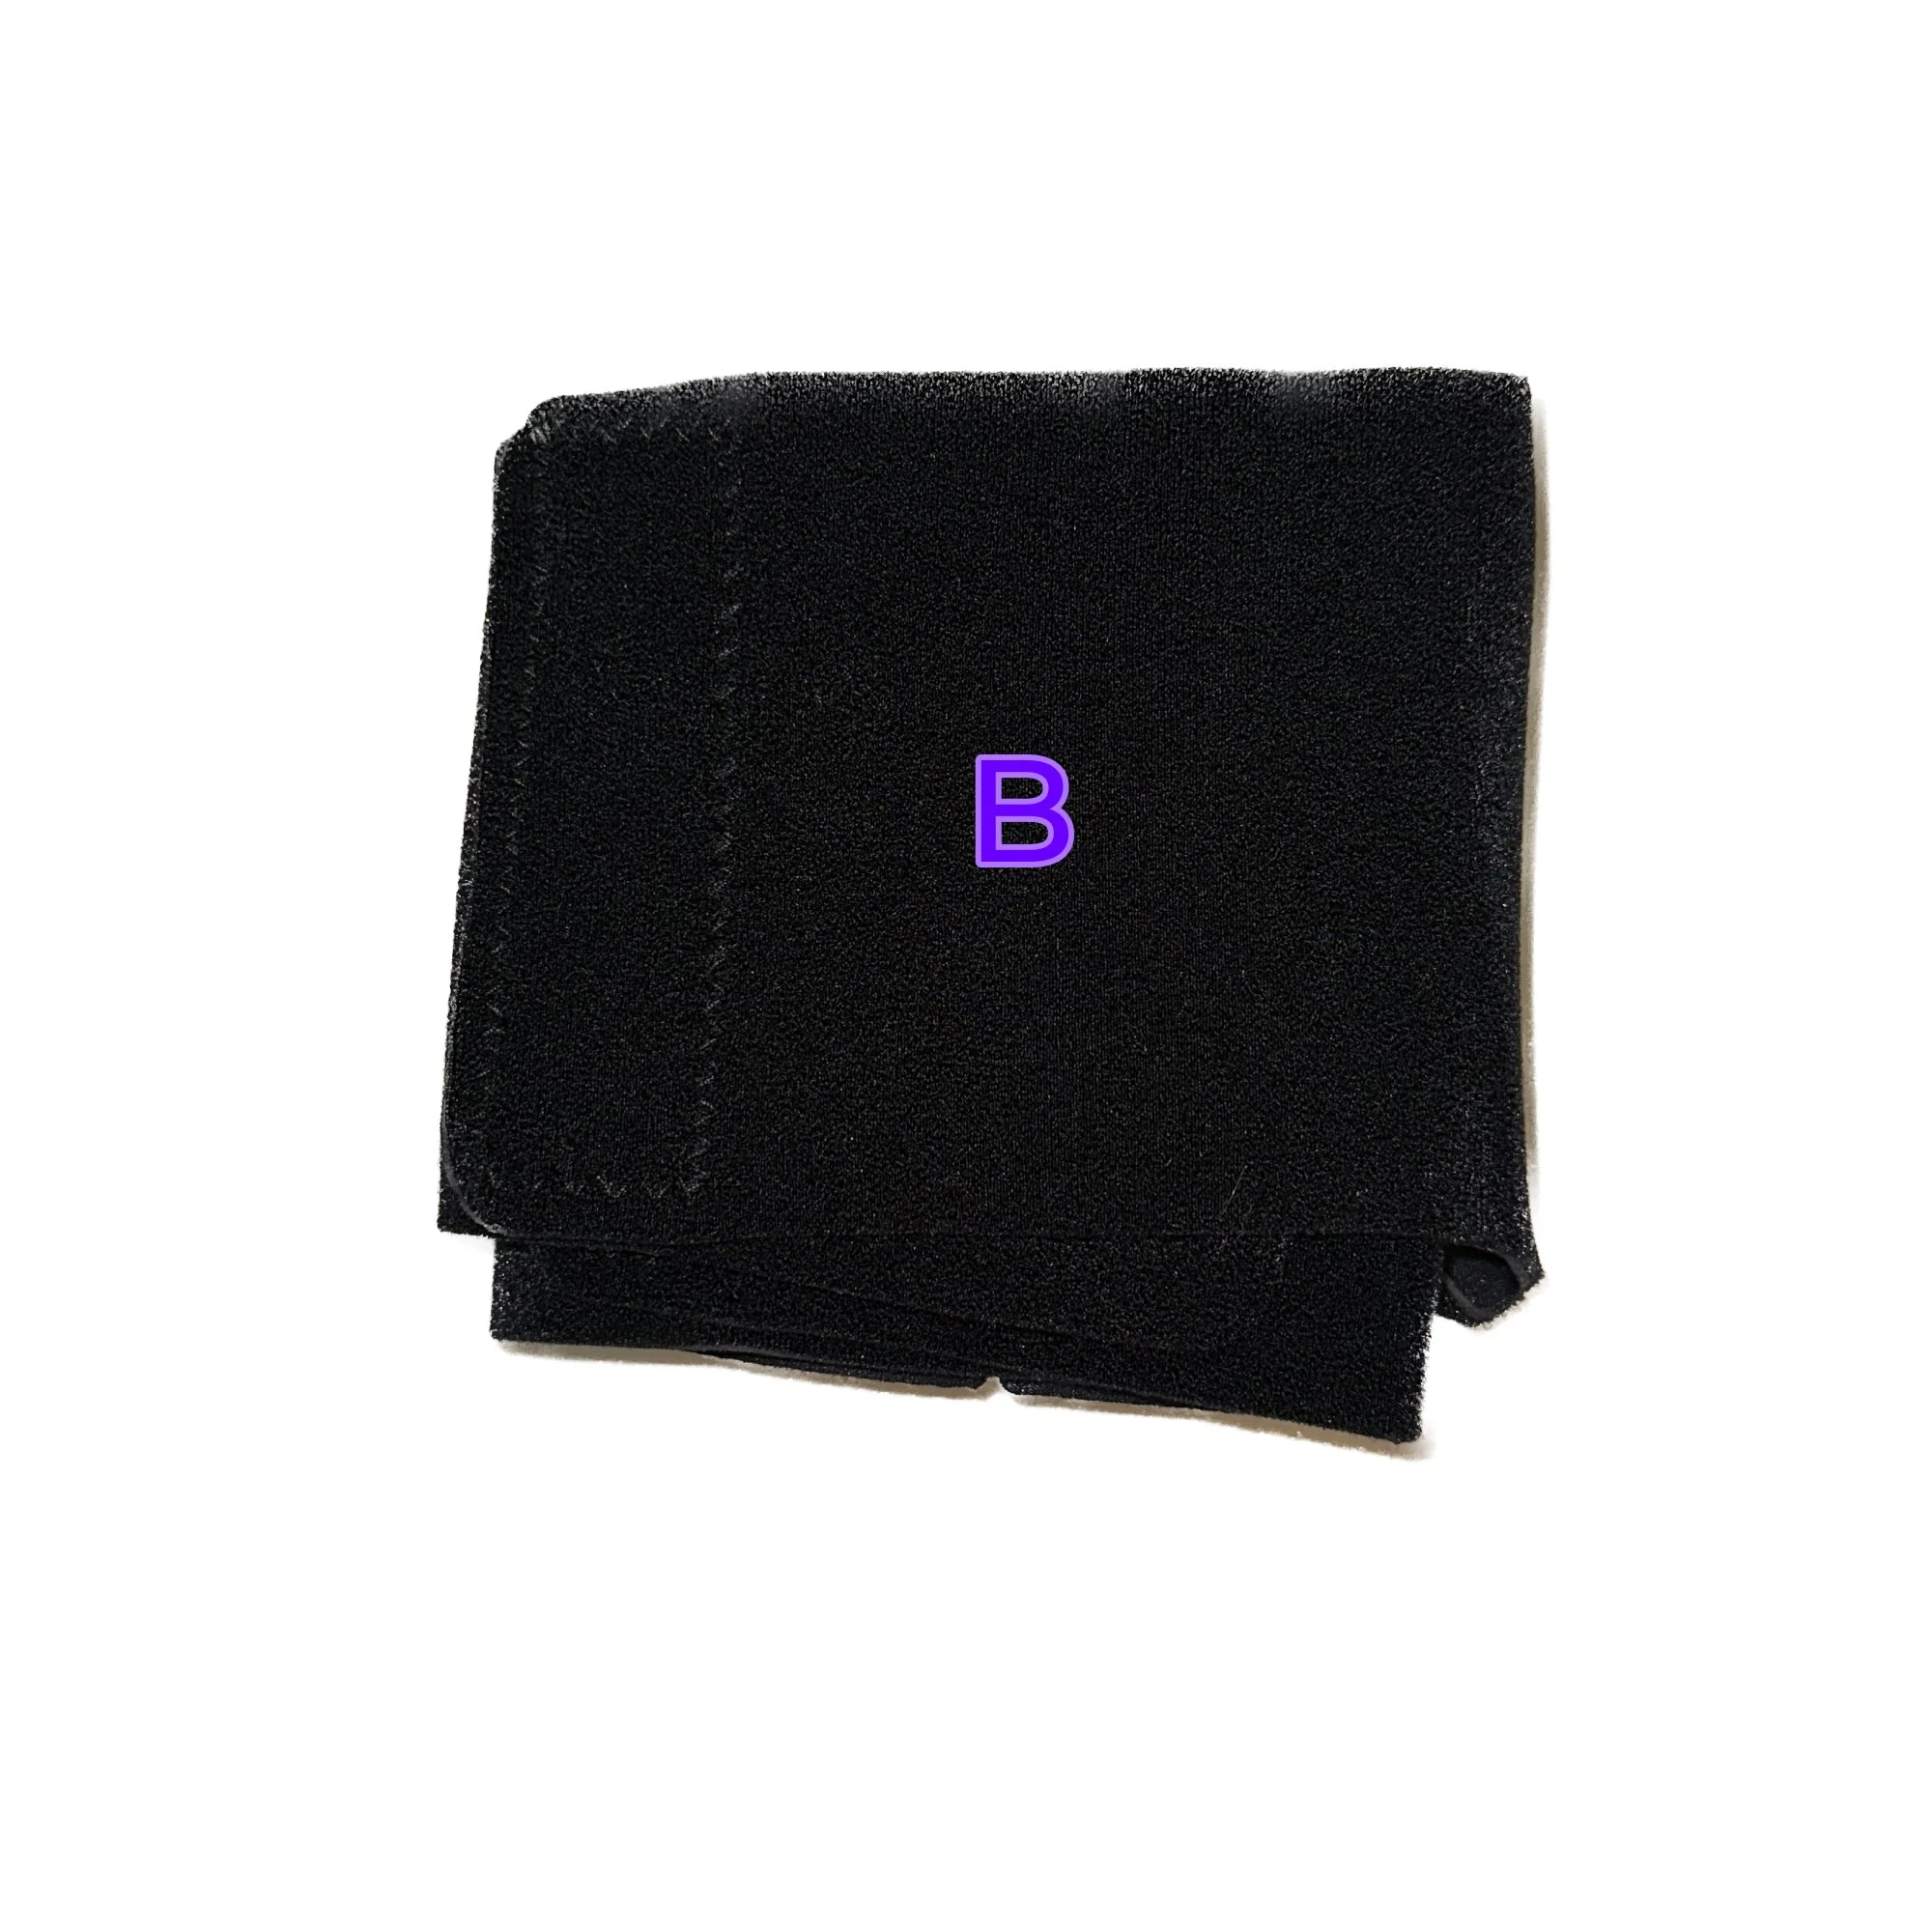
Lay the Arm BioSleeve sensor side up on a flat surface, with straps A, C, E, and F, fasteners B and D, and mid-section G.
2. Insert strap A through fastener B, and strap C through fastener D. Fold straps E and F across each other.
3. Continue to wrap straps A, E, and F around themselves.
4. Create a loop with the C strap but do not fully tighten. Secure strap C. Then, fasten straps A, E, and F by gently pulling around and securing via Velcro.
5. Fold the top portion of the sleeve down and pull through the loop just created with the C strap, making sure there is still space left in the loop.
6. Fold the section you just pulled through the loop upwards and back on itself. Pull this back through the loop created with the C strap so that it sits neatly.
7. Unfasten strap C, pull C around the folded sleeve, and secure next to fastener D.
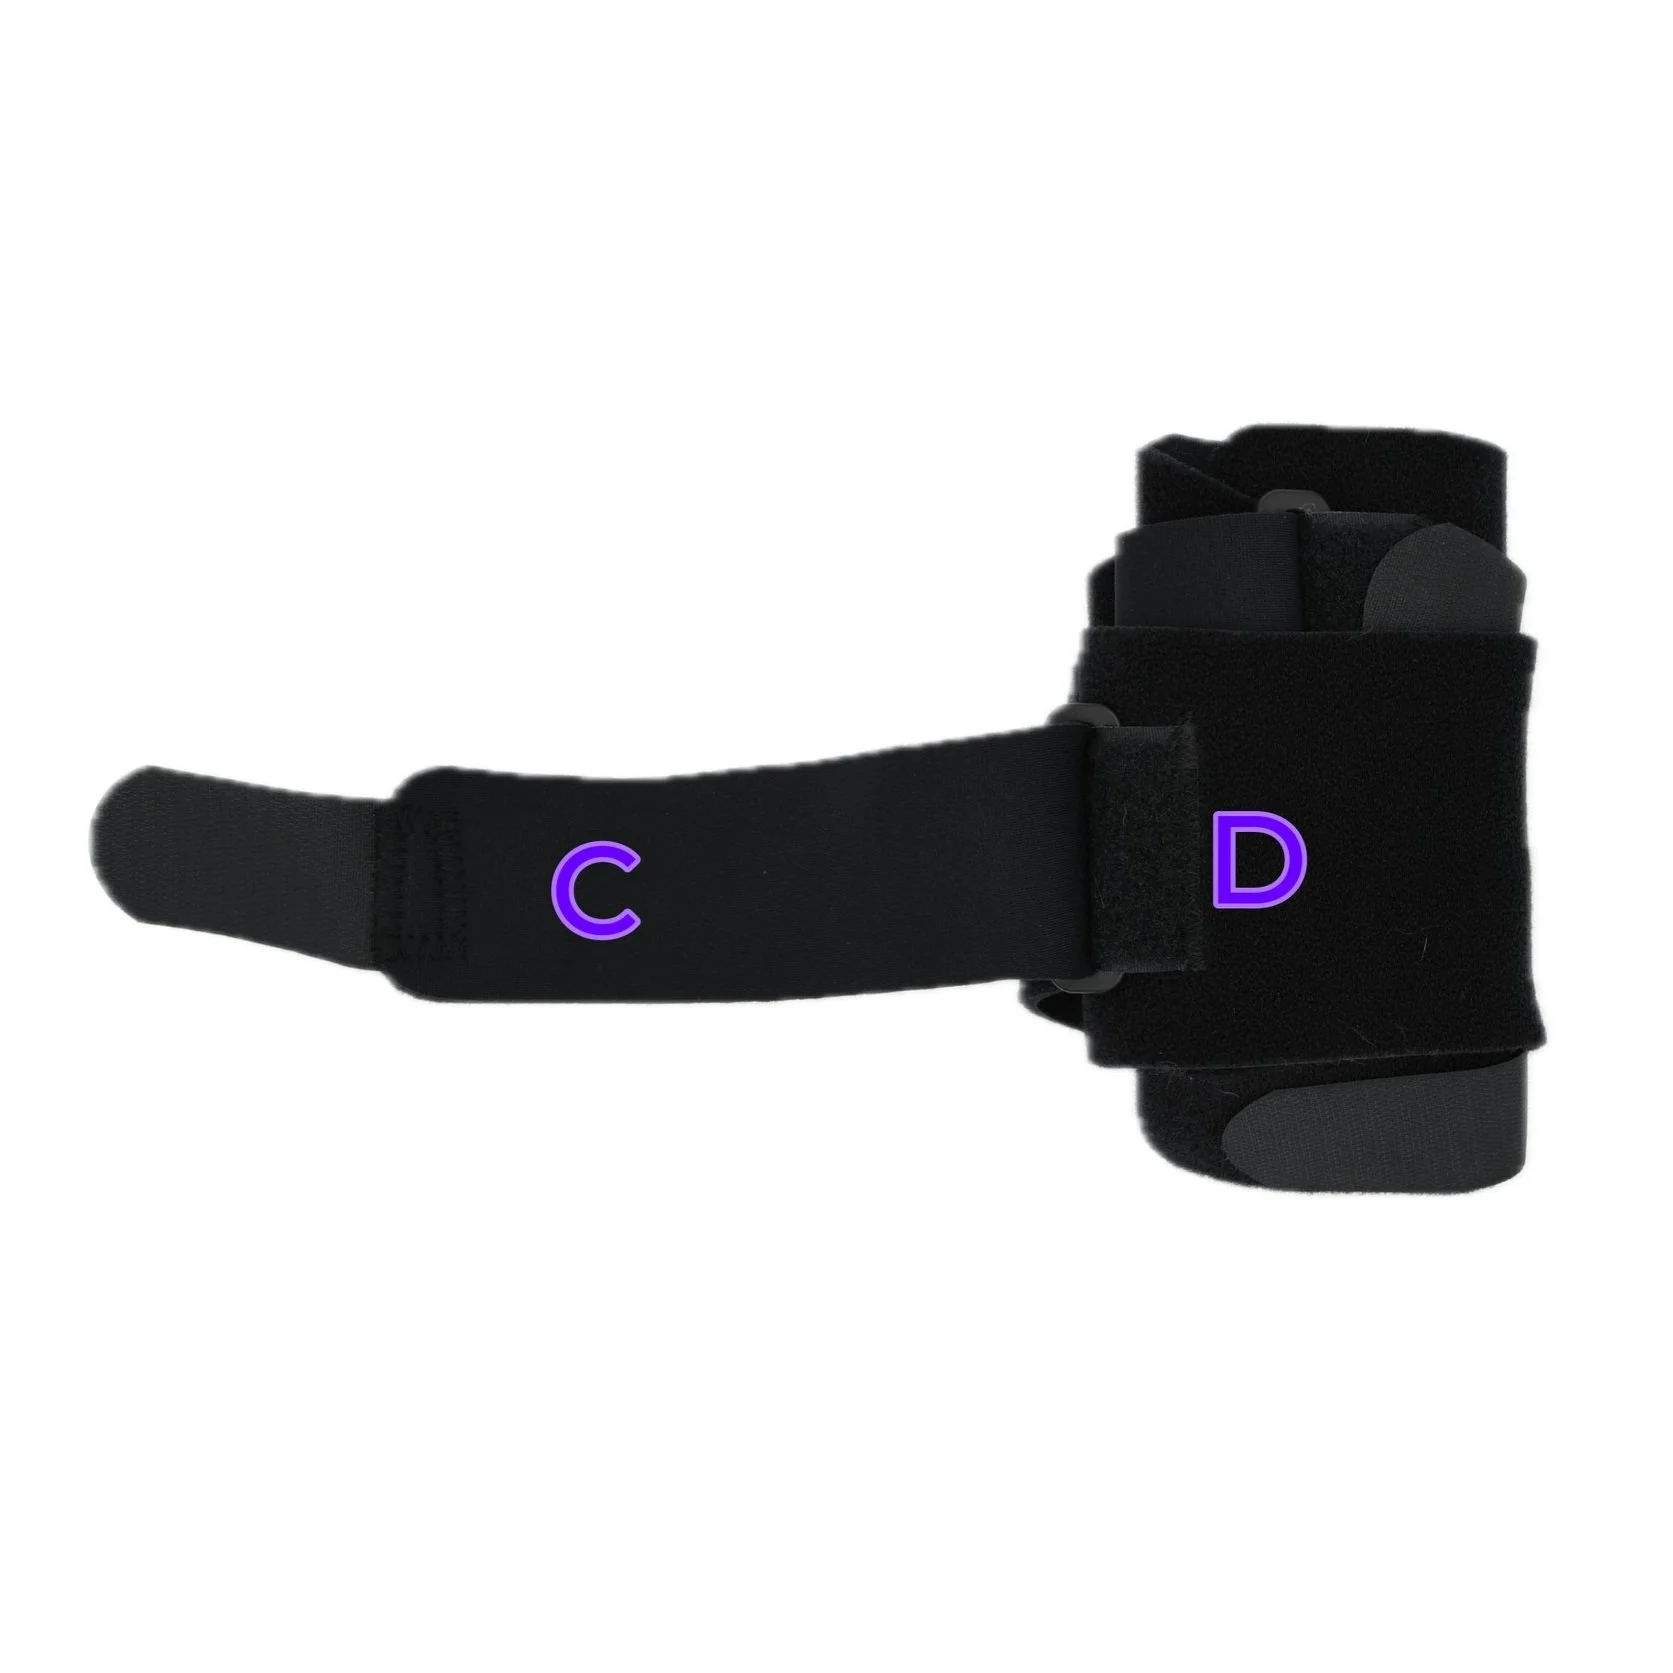


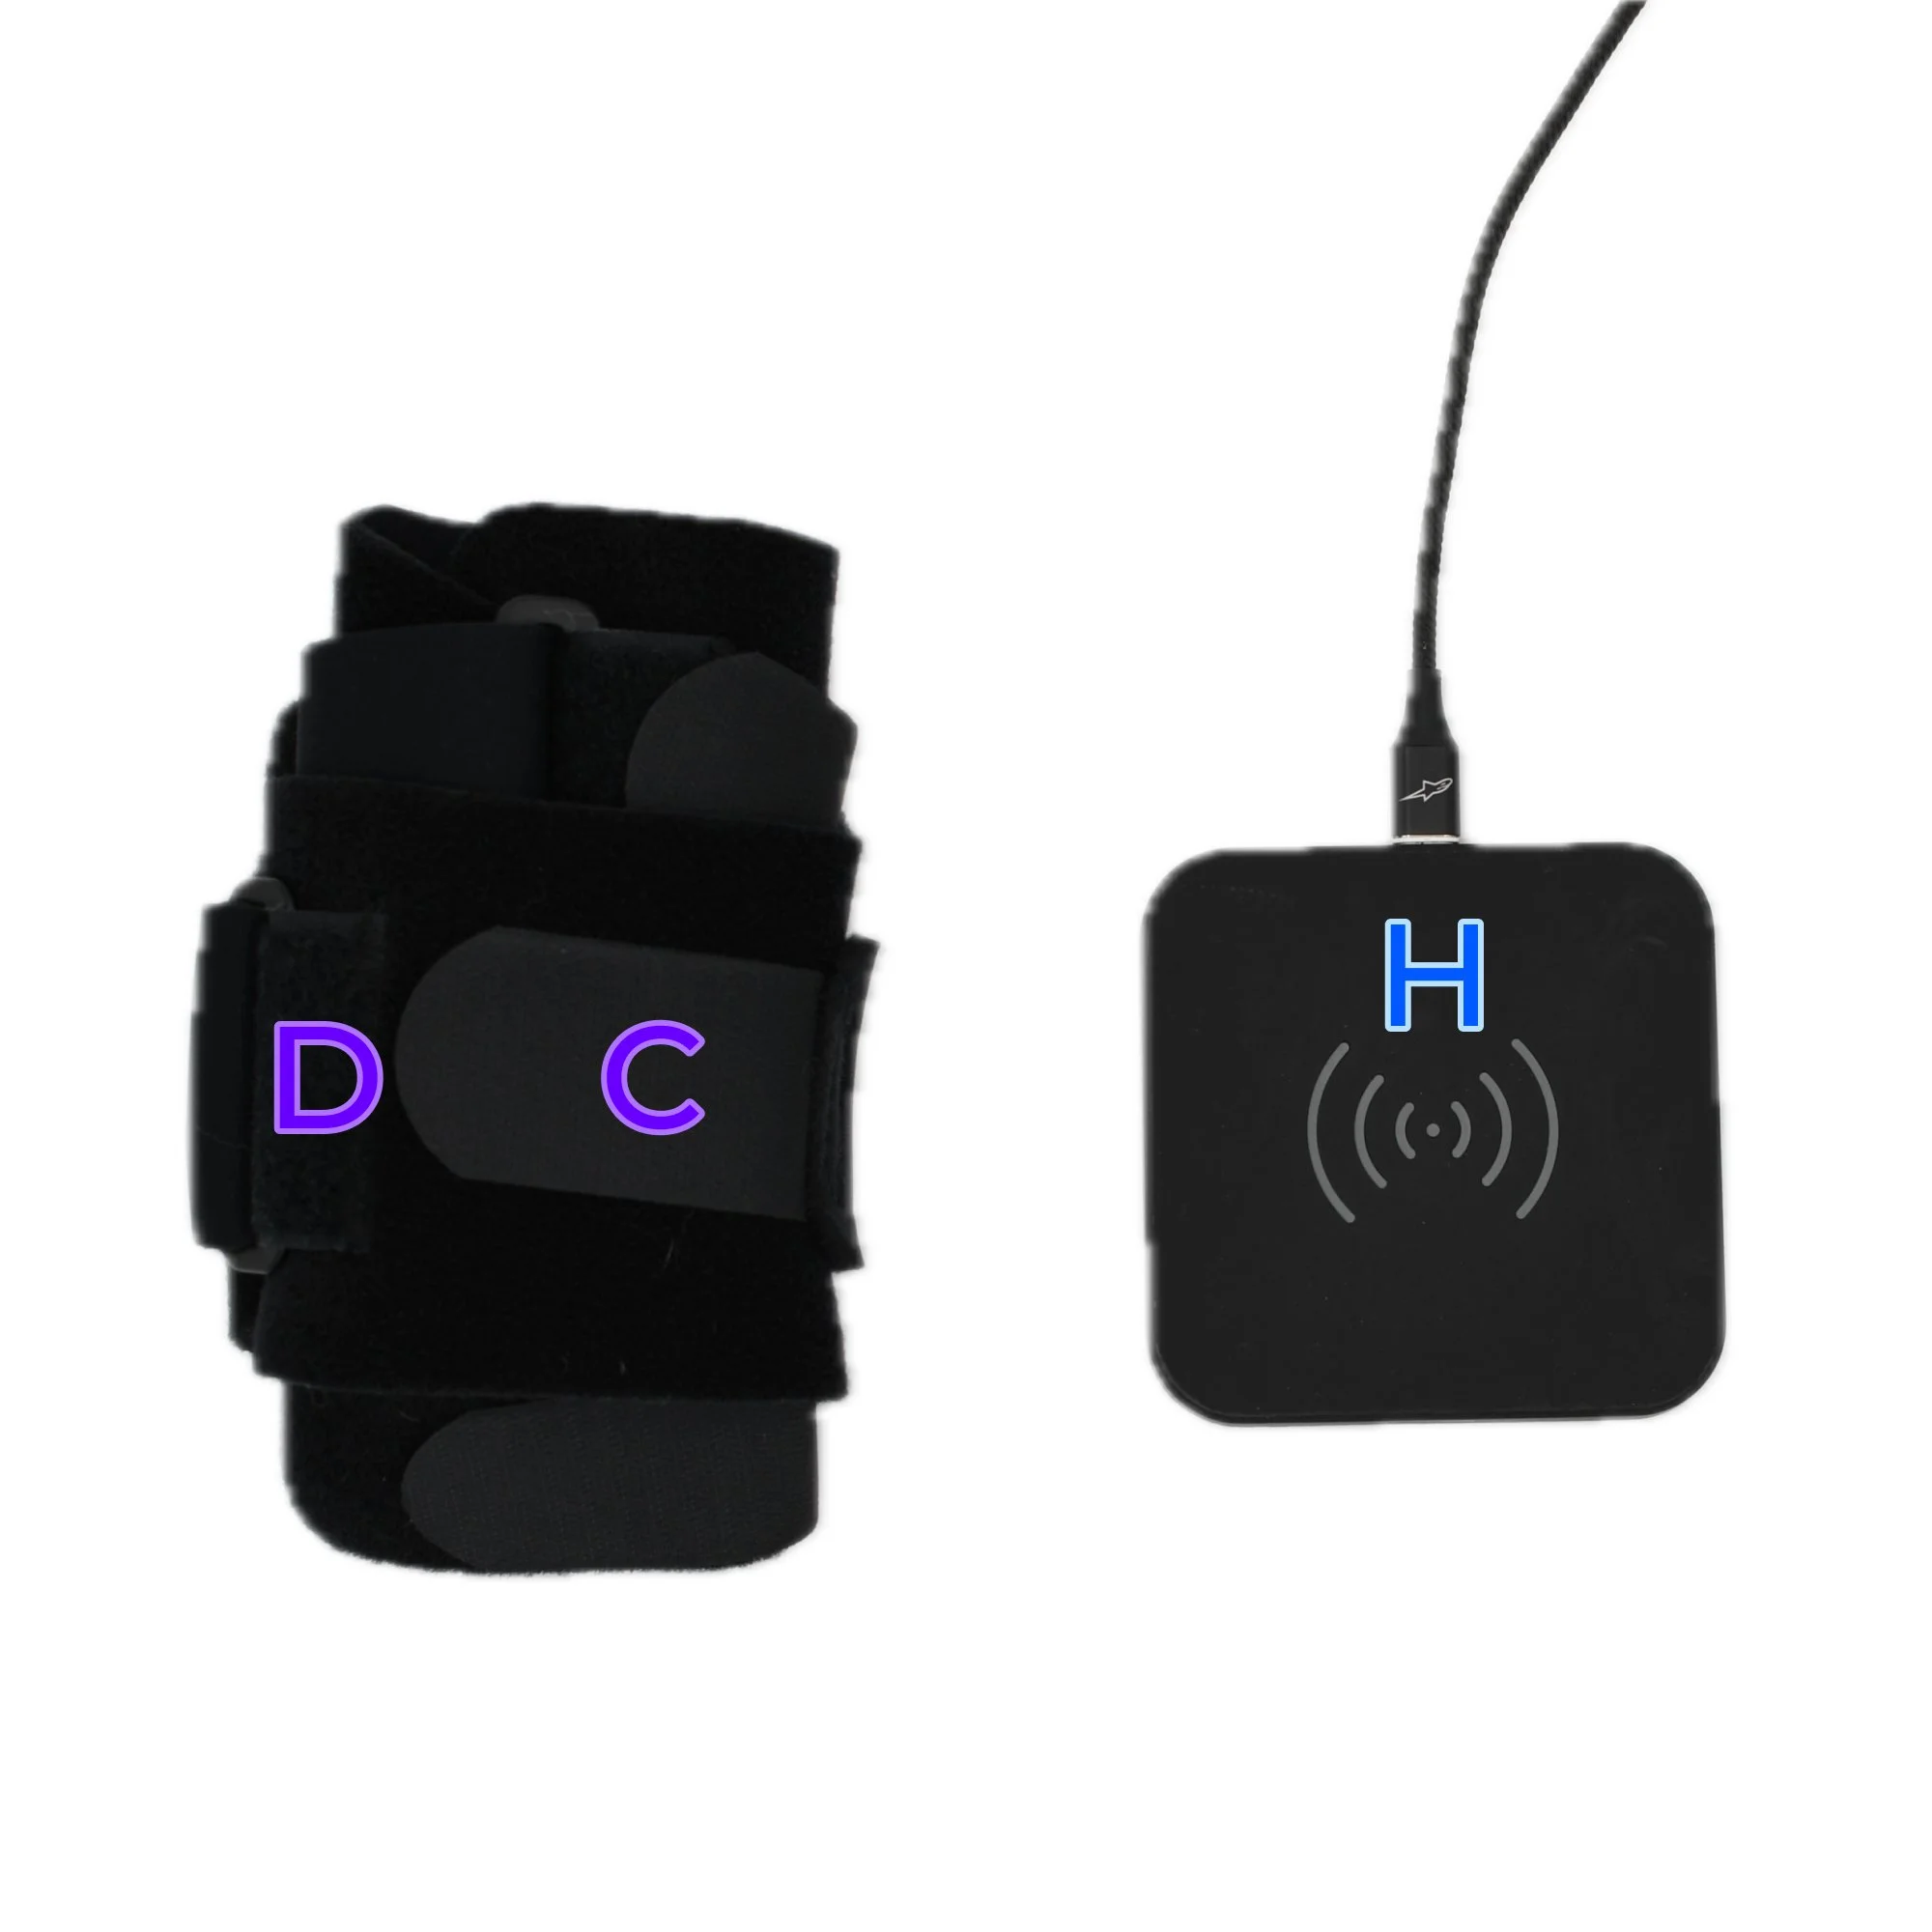
8. Now that your sleeve is folded, find your charging pad, labeled H.
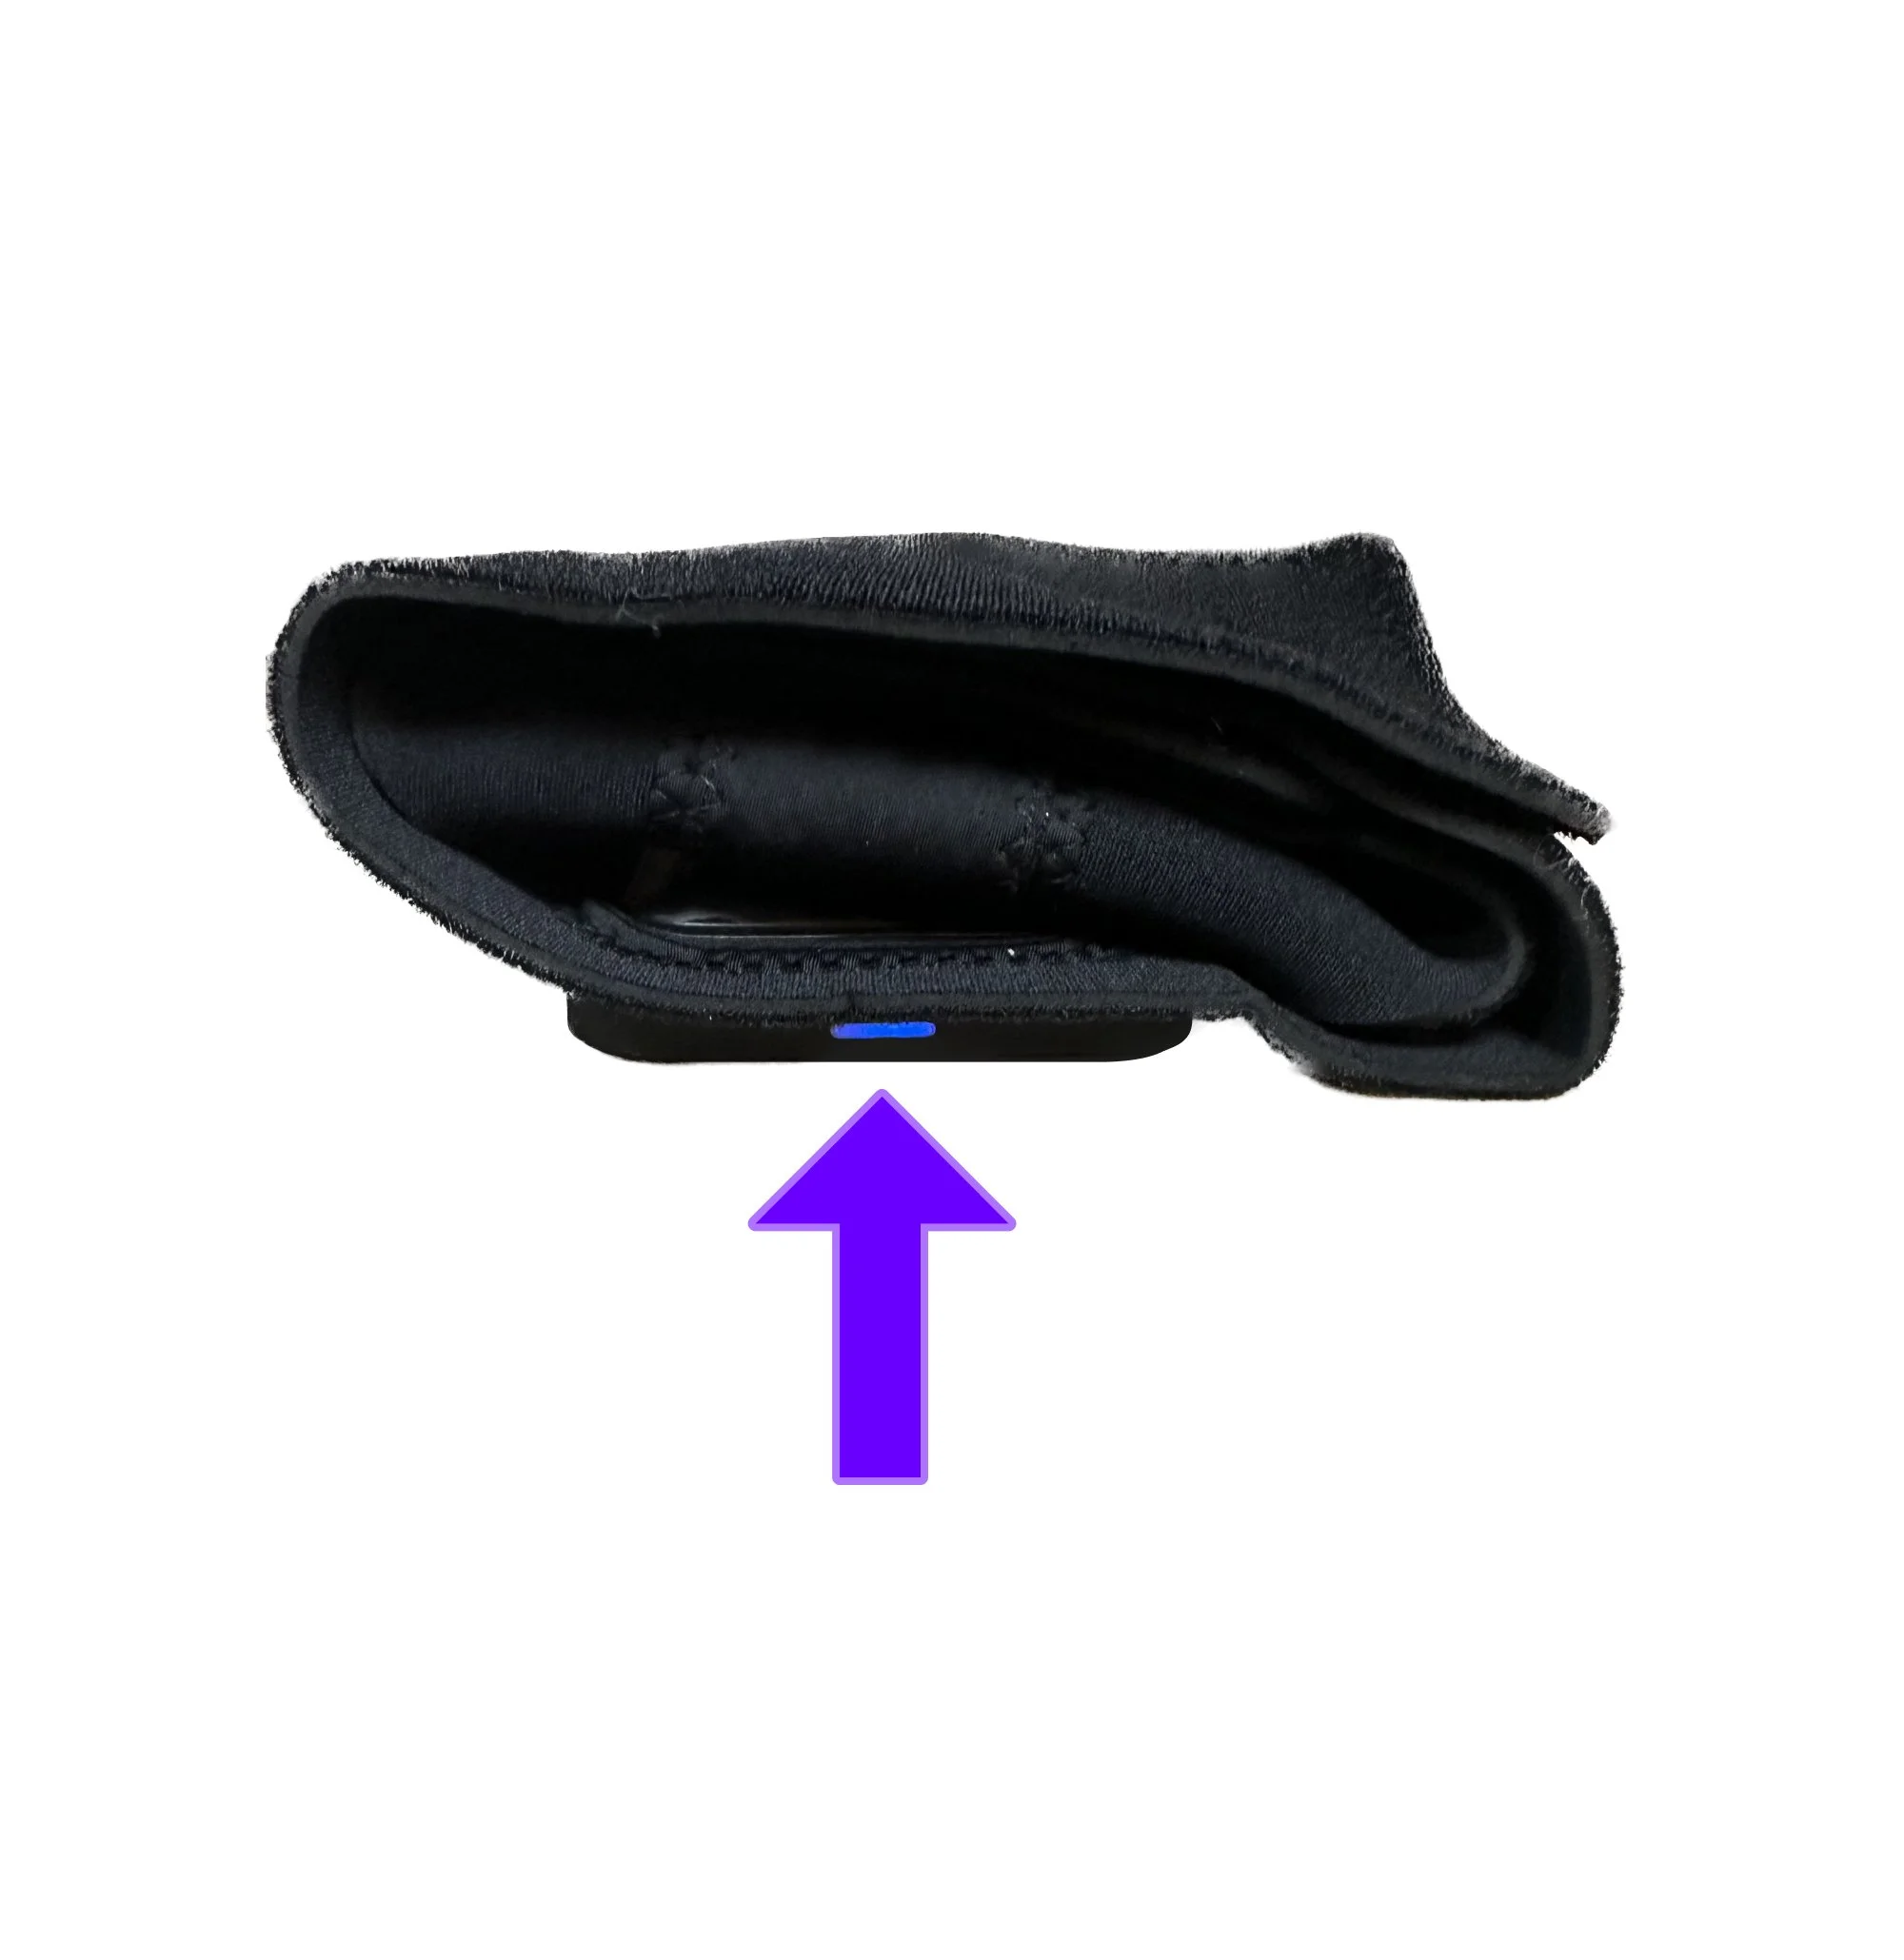
9. Insert charger H in the loop across the bottom of the sleeve, opposite the side where you fastened strap C in Step 7.


You’ll know the sleeve is charging when the blue LED light on the charging pad is illuminated and solid. If the blue light blinks or turns off, the sleeve may be placed incorrectly on the charging pad. Adjust its position until you see the solid blue light.
Folding your Leg BioSleeve for Charging
You may follow these instructions for both Arm & Leg BioSleeves. For Arm BioSleeves, fold the top two and bottom two straps as pairs, respectively, to match the instructions given below.
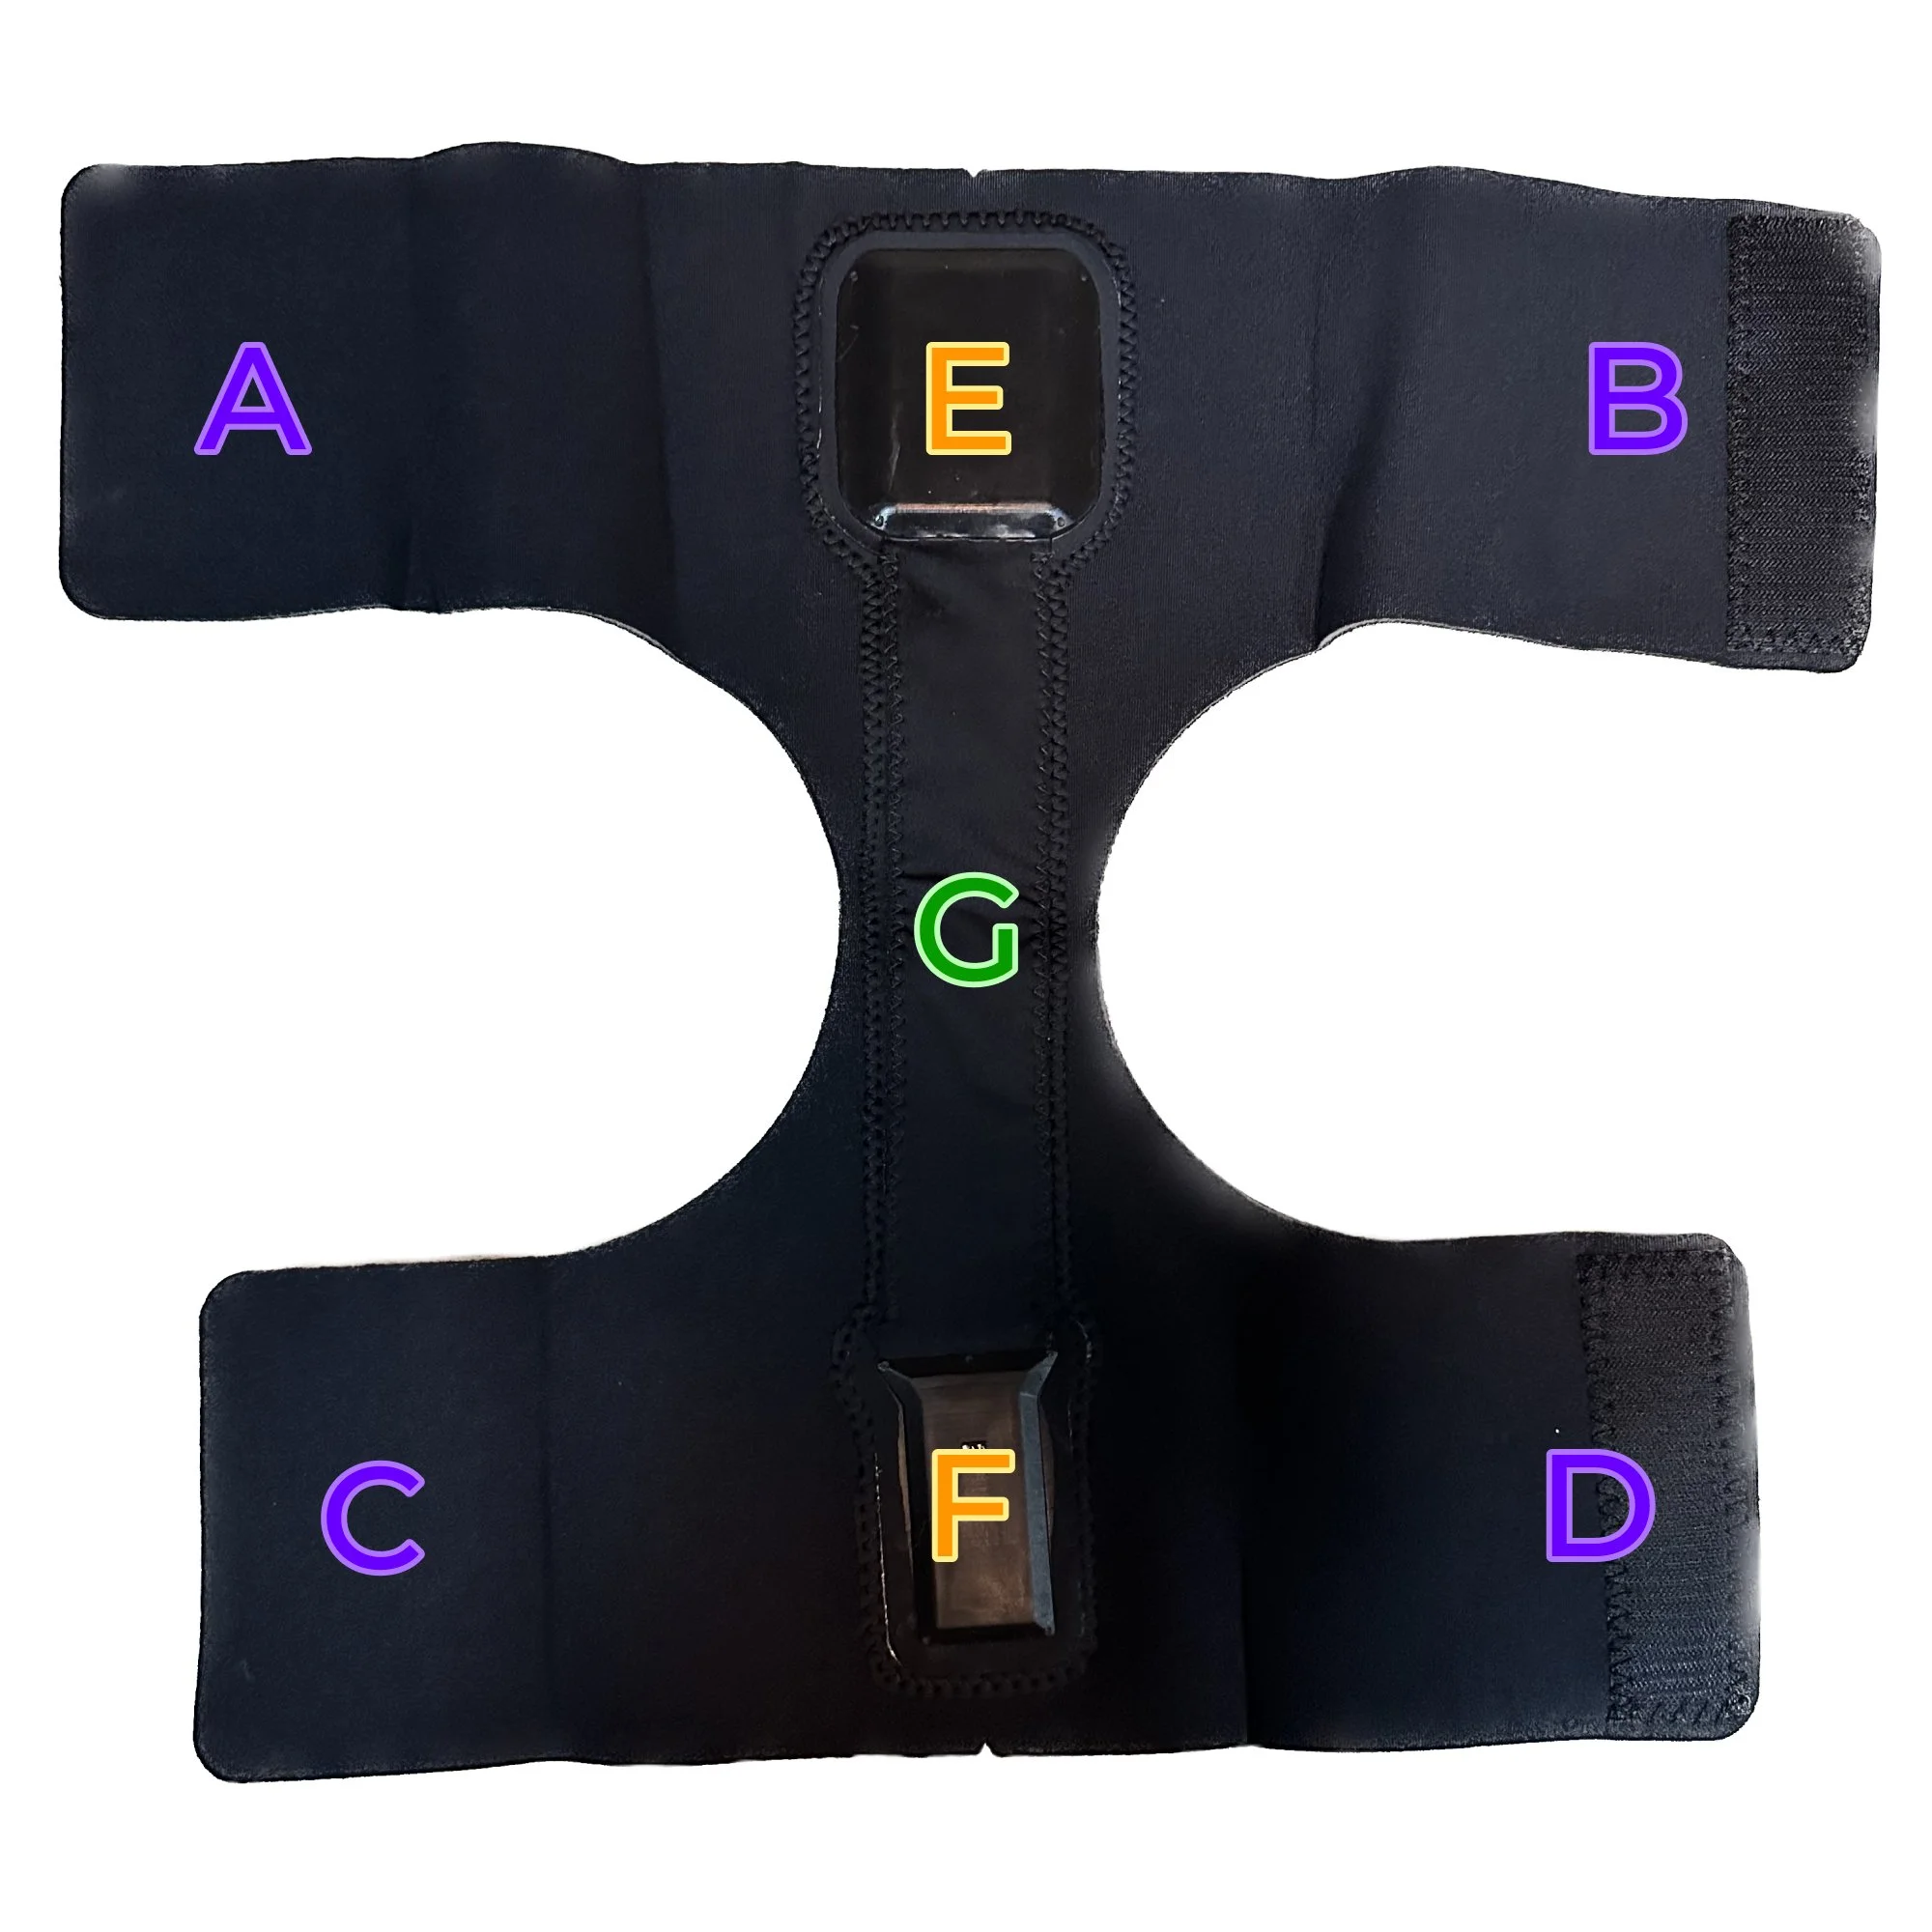
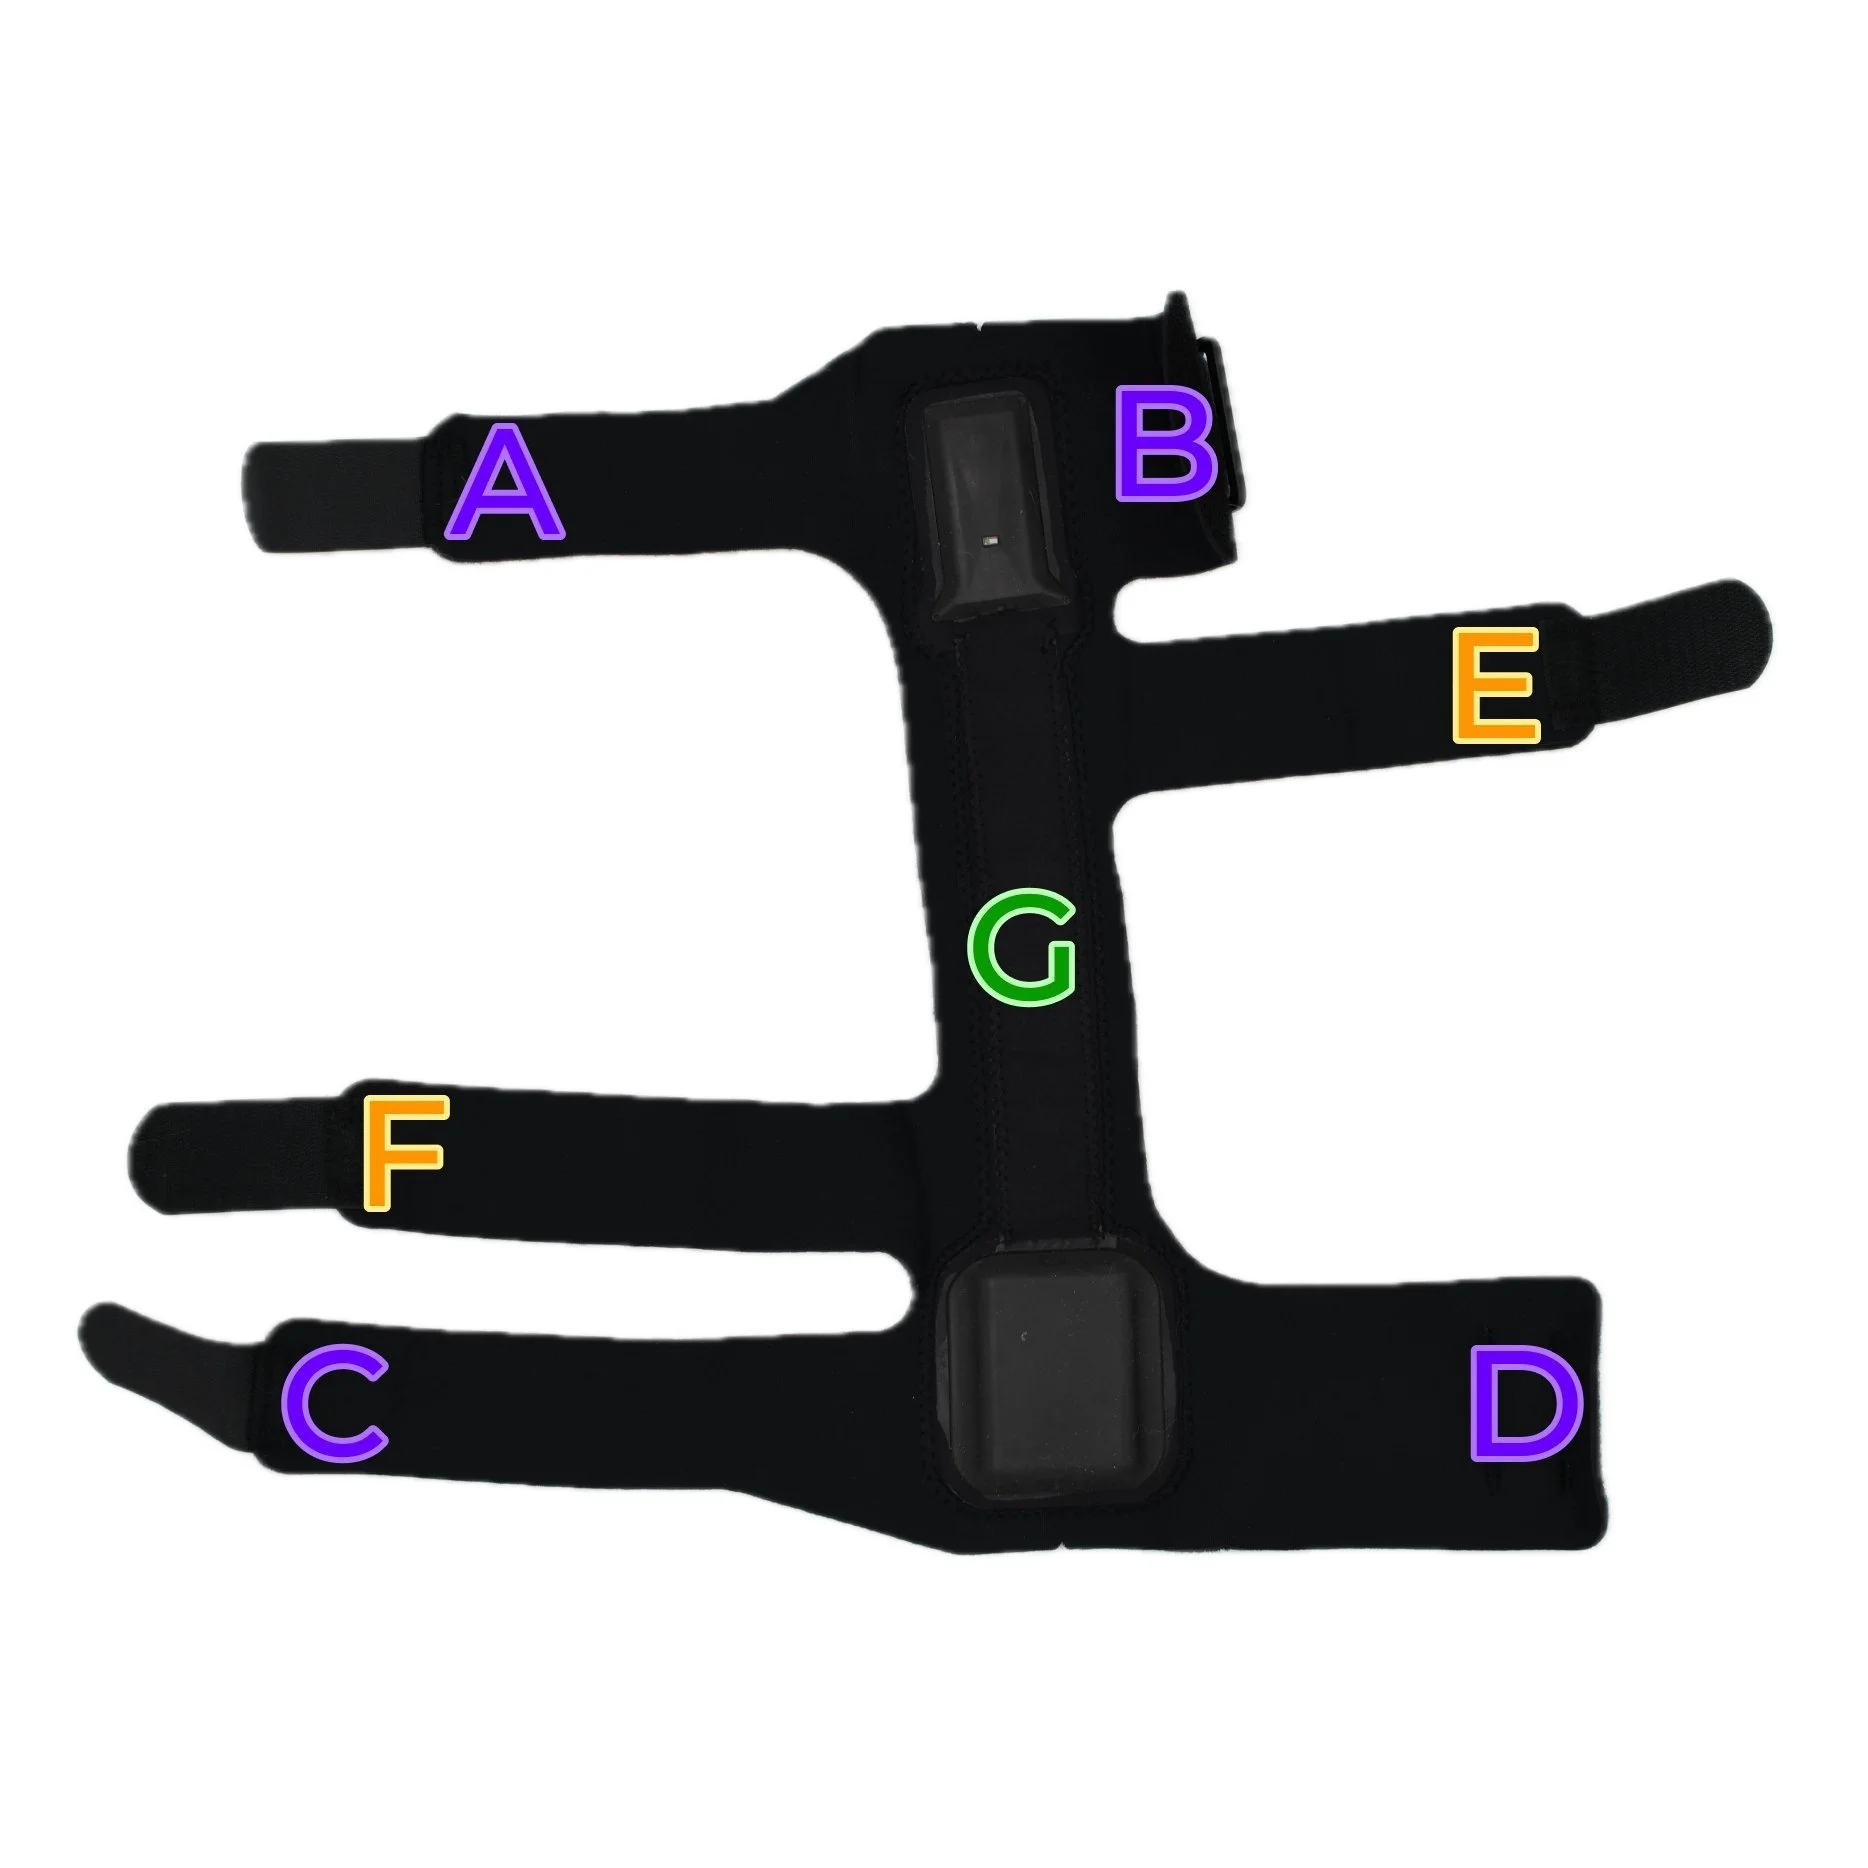
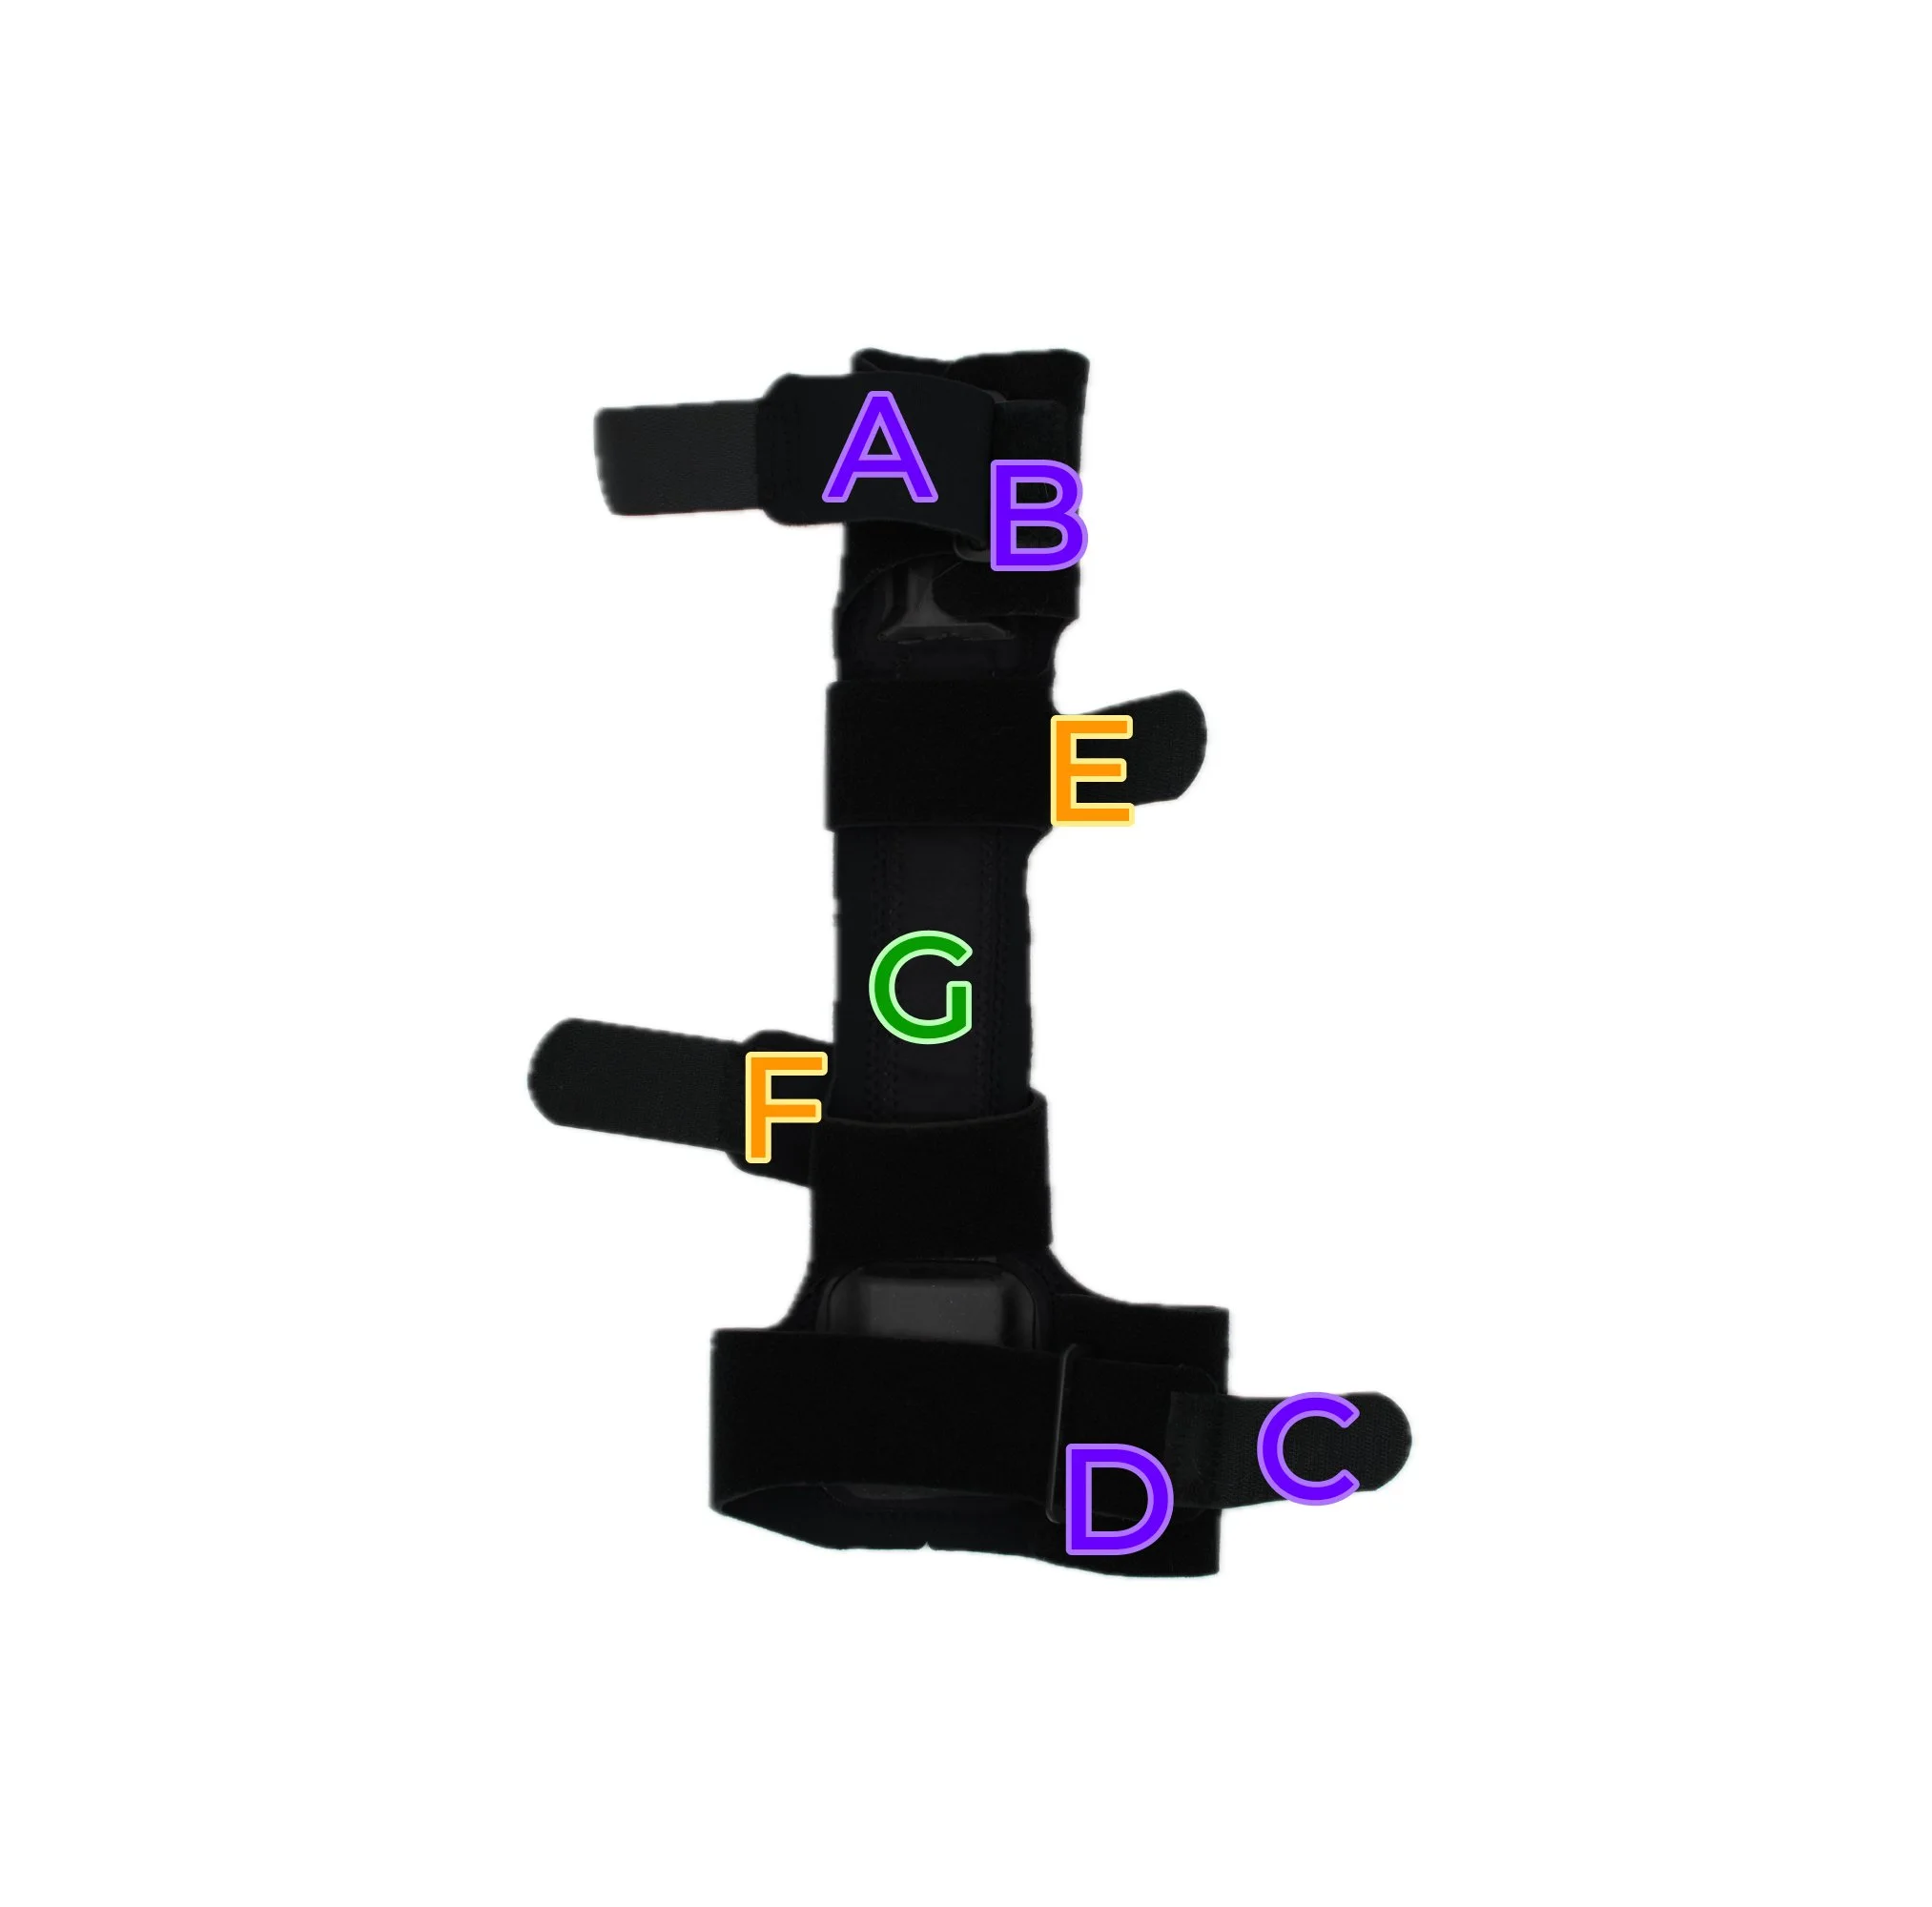
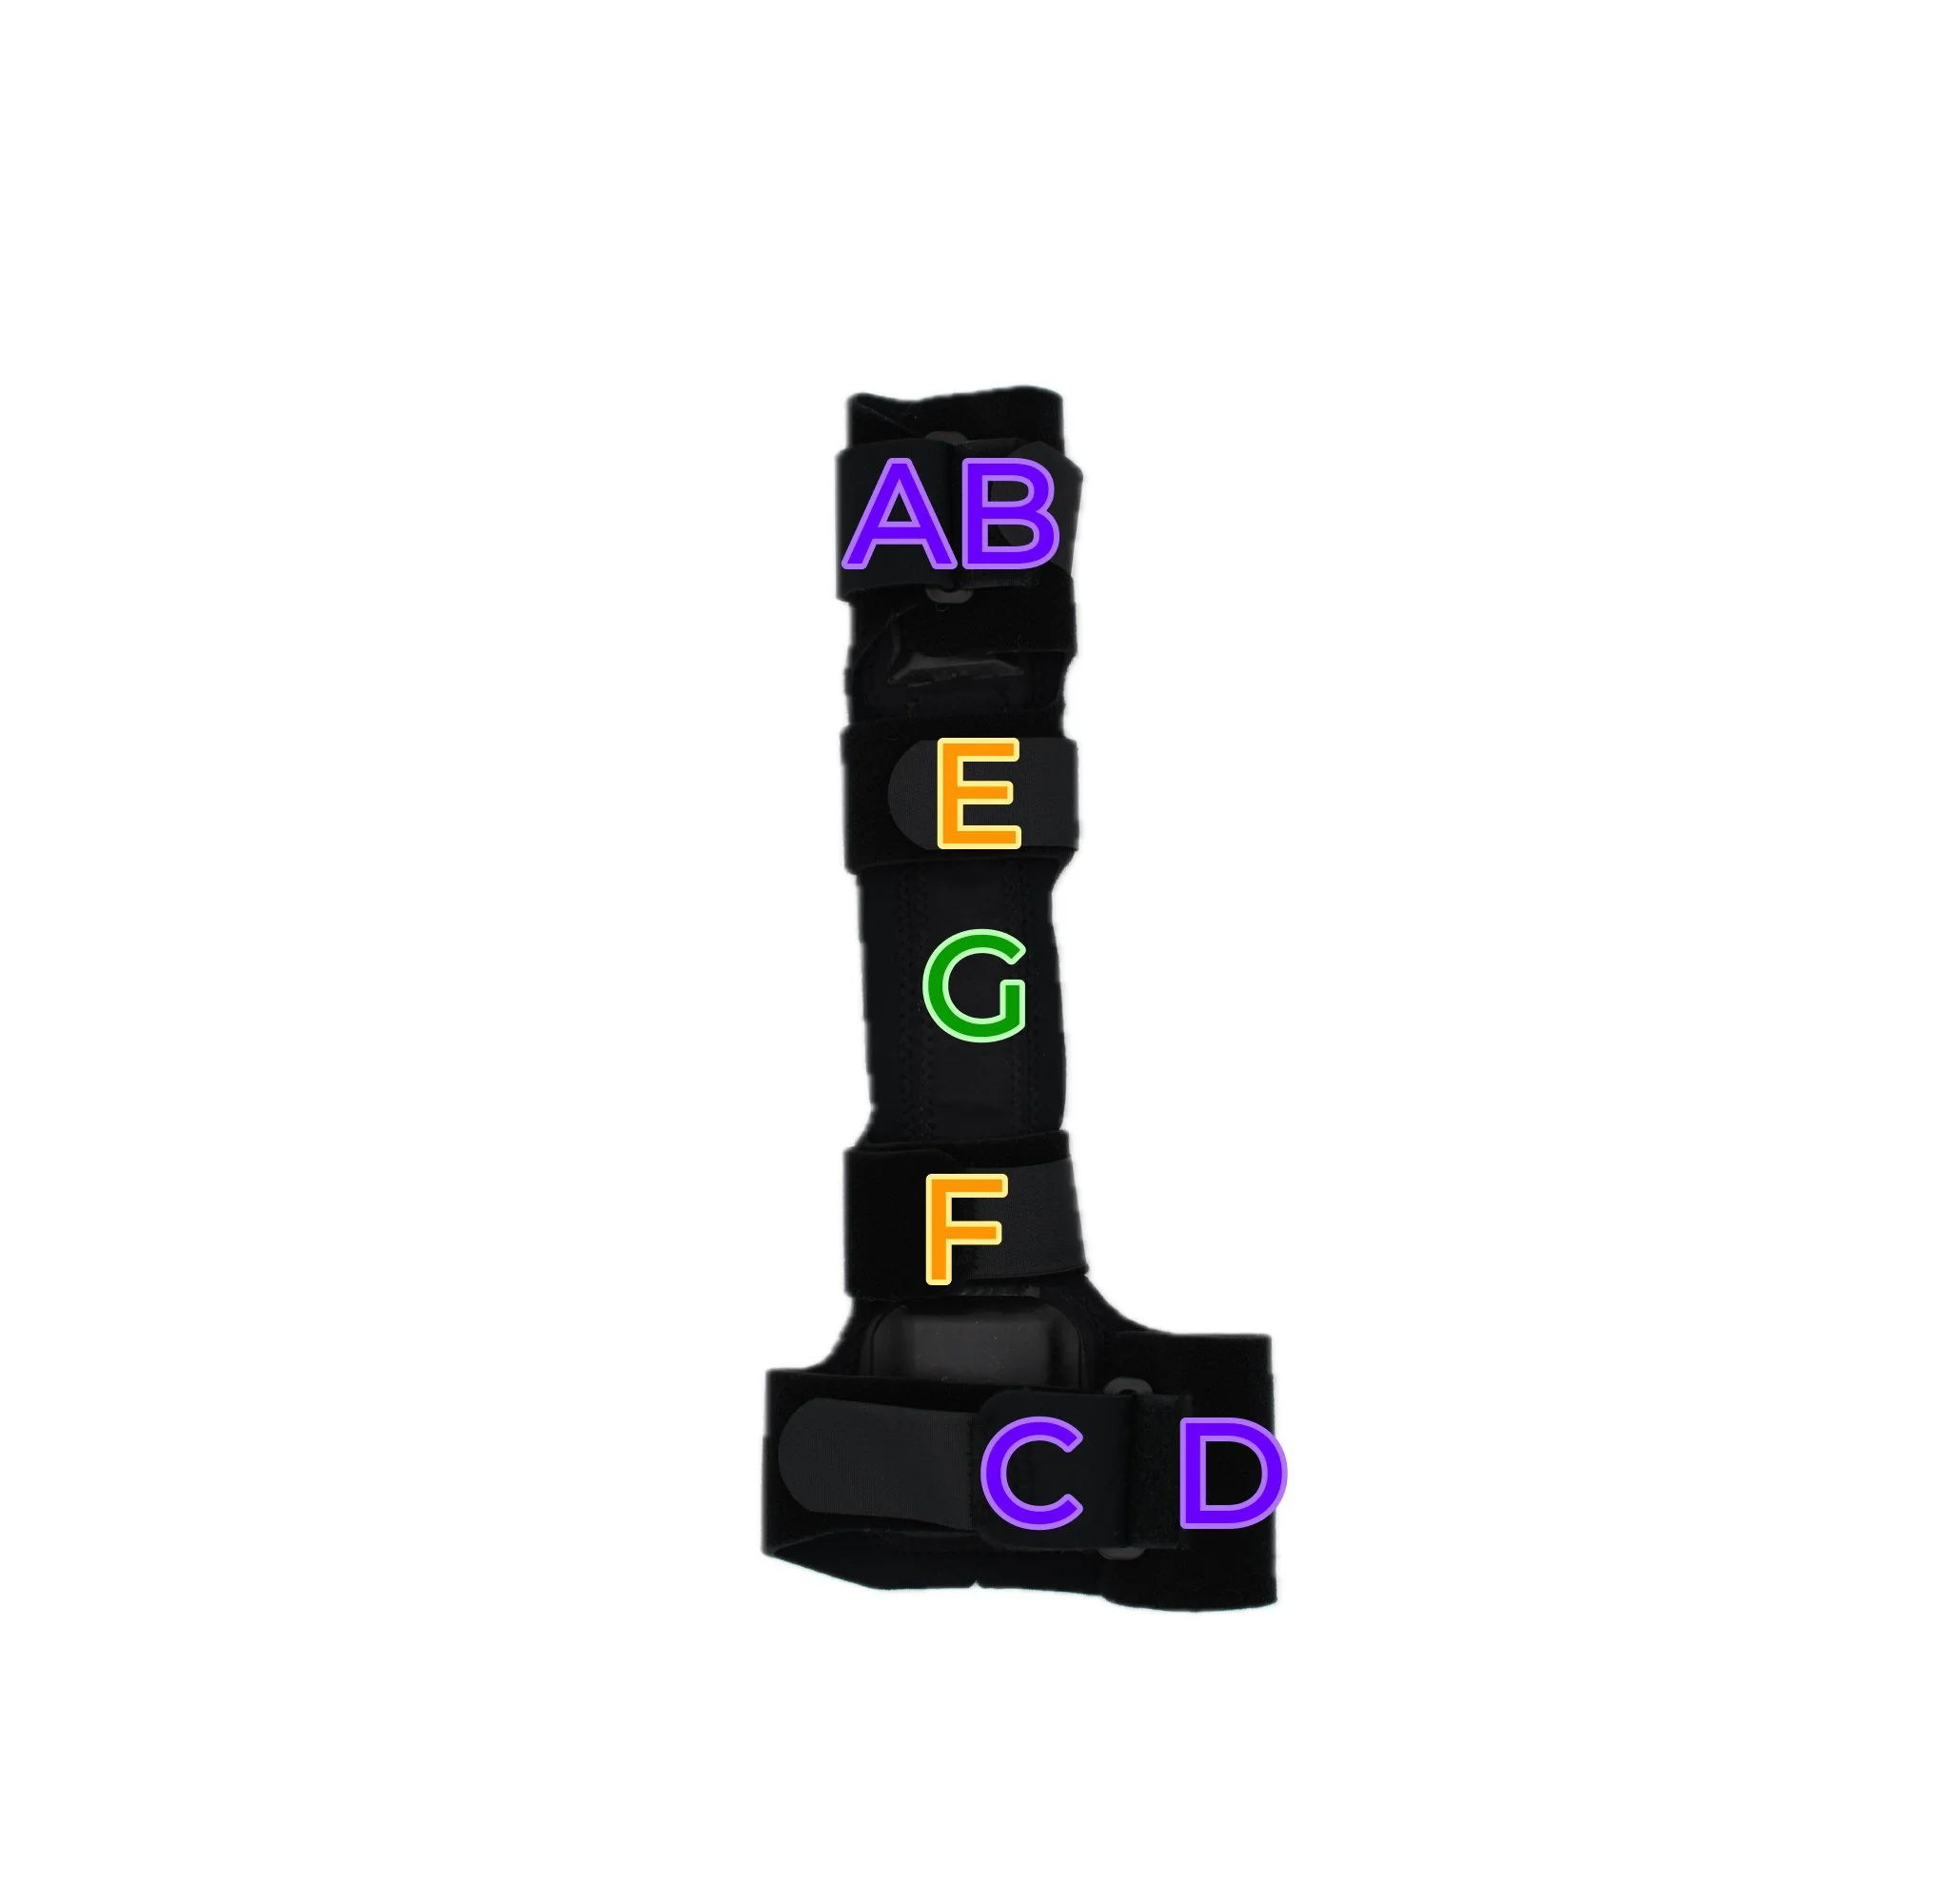
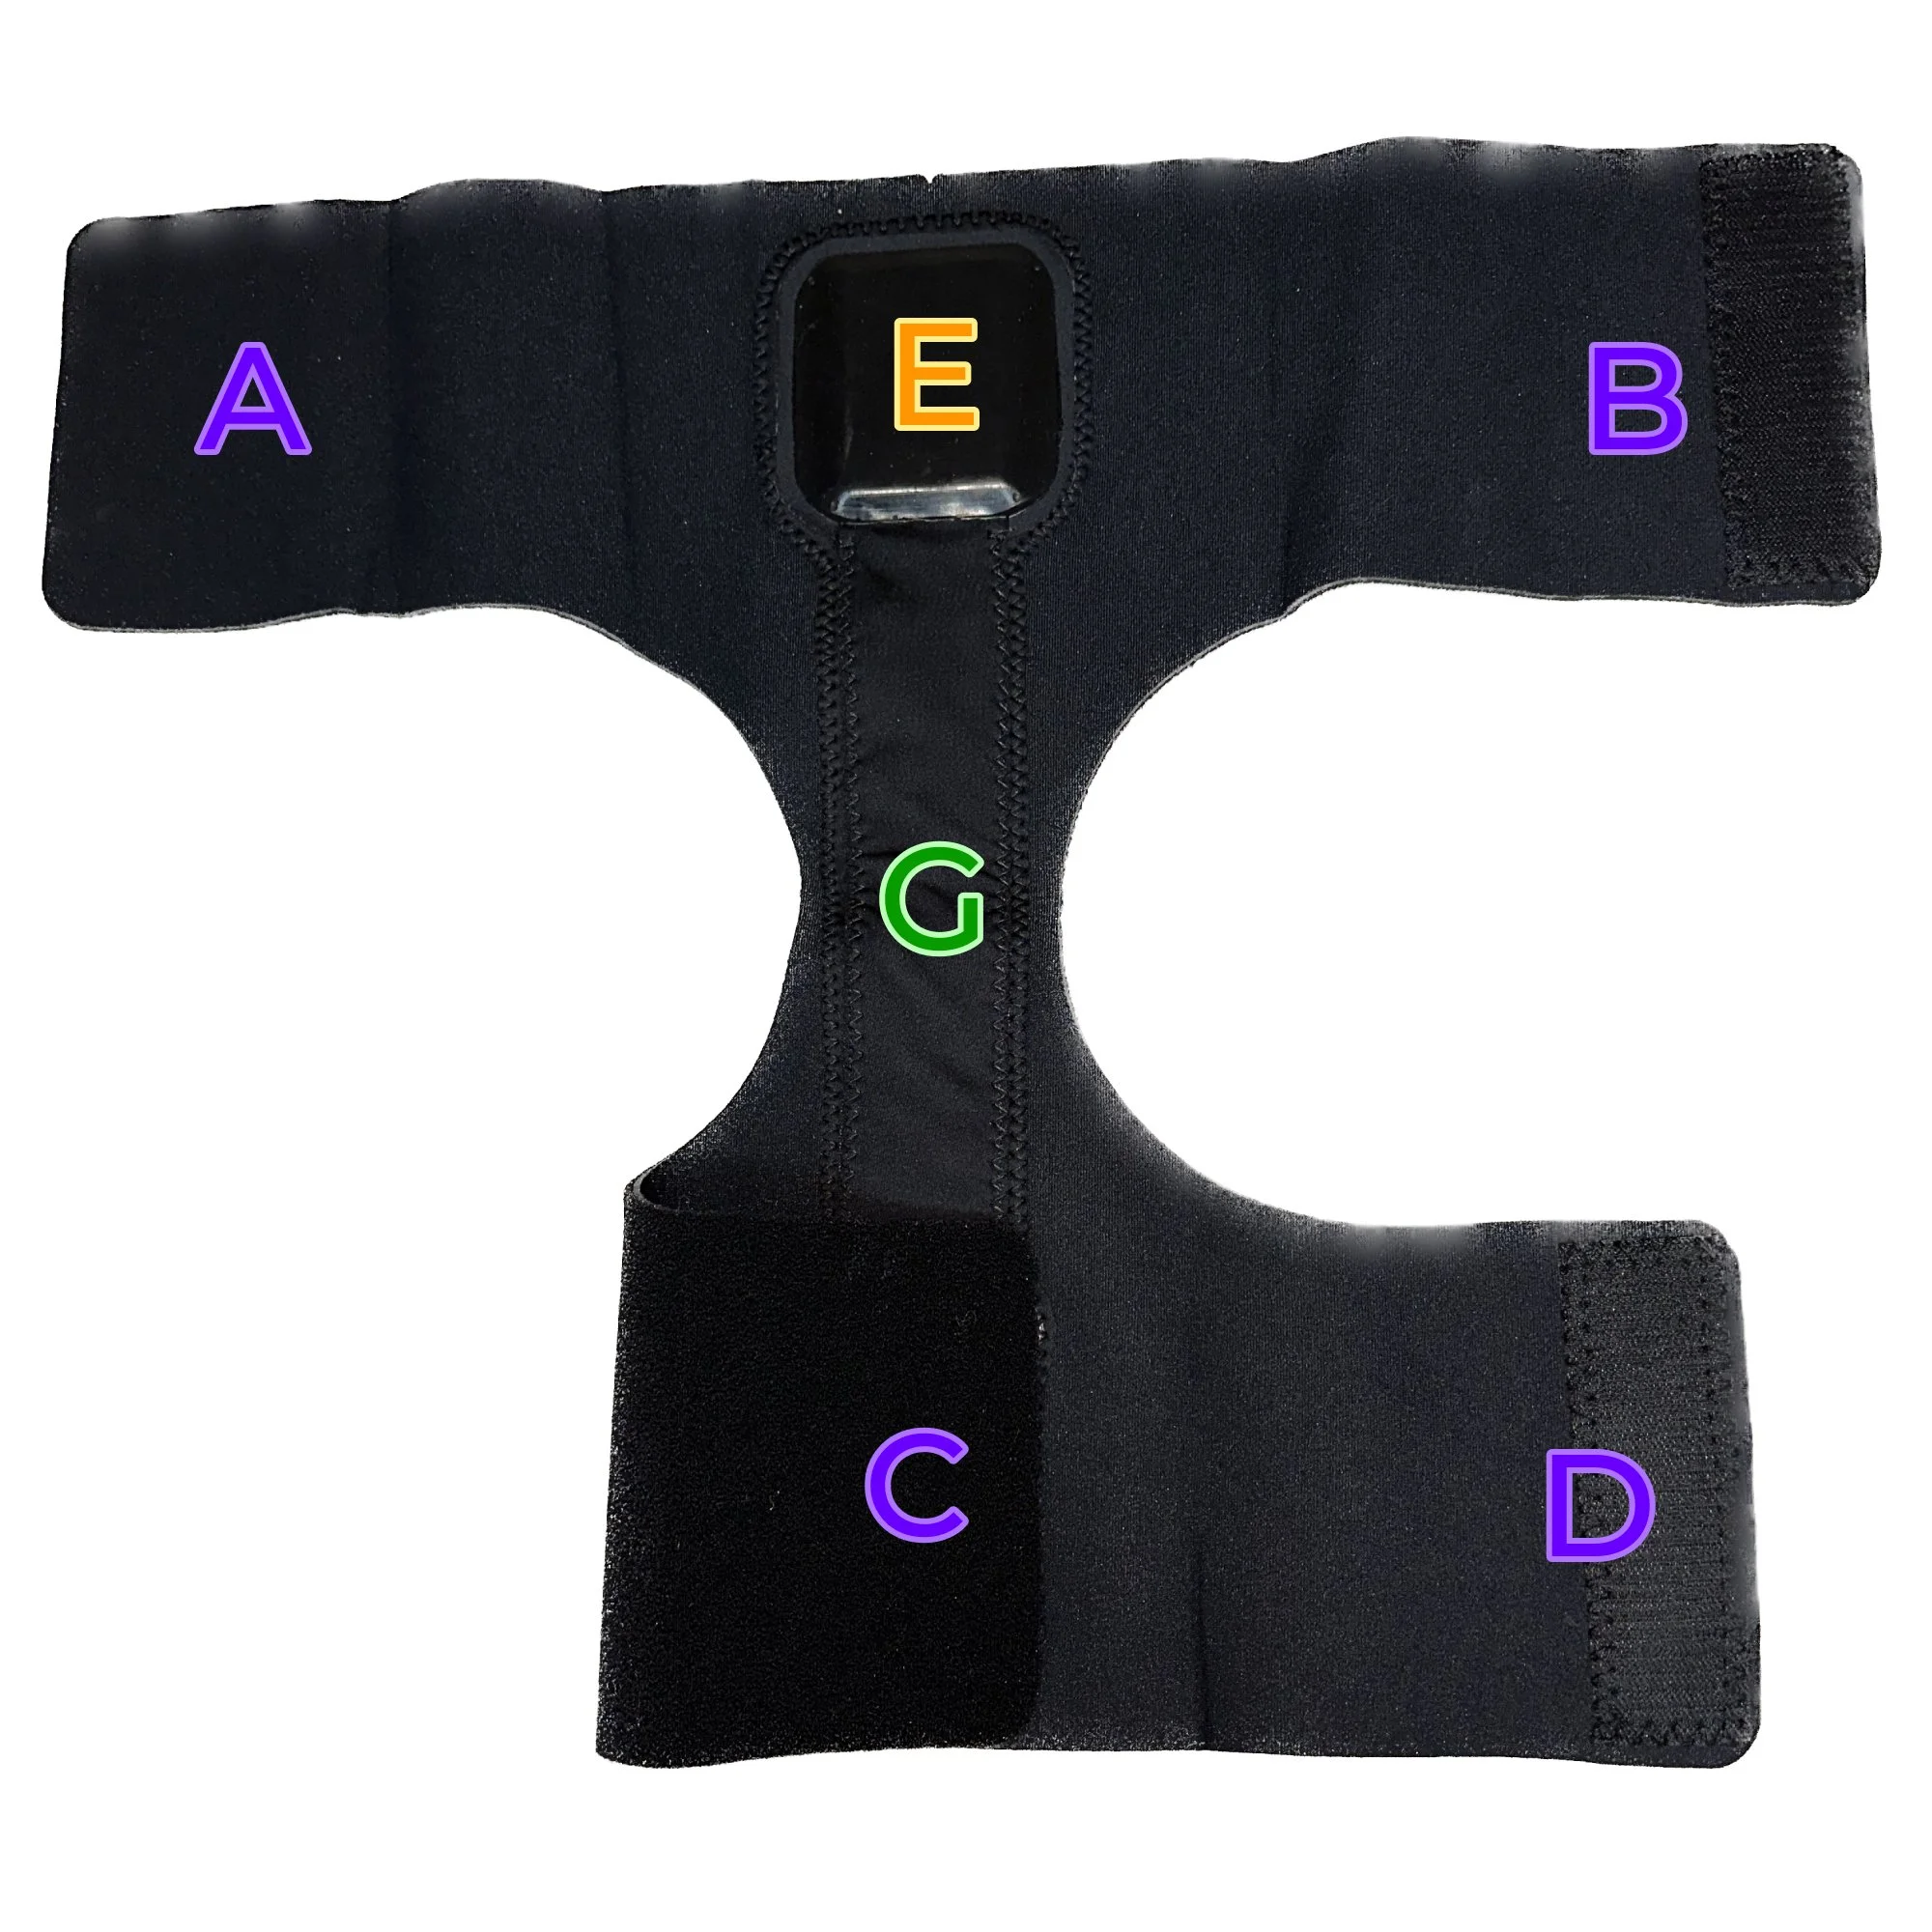
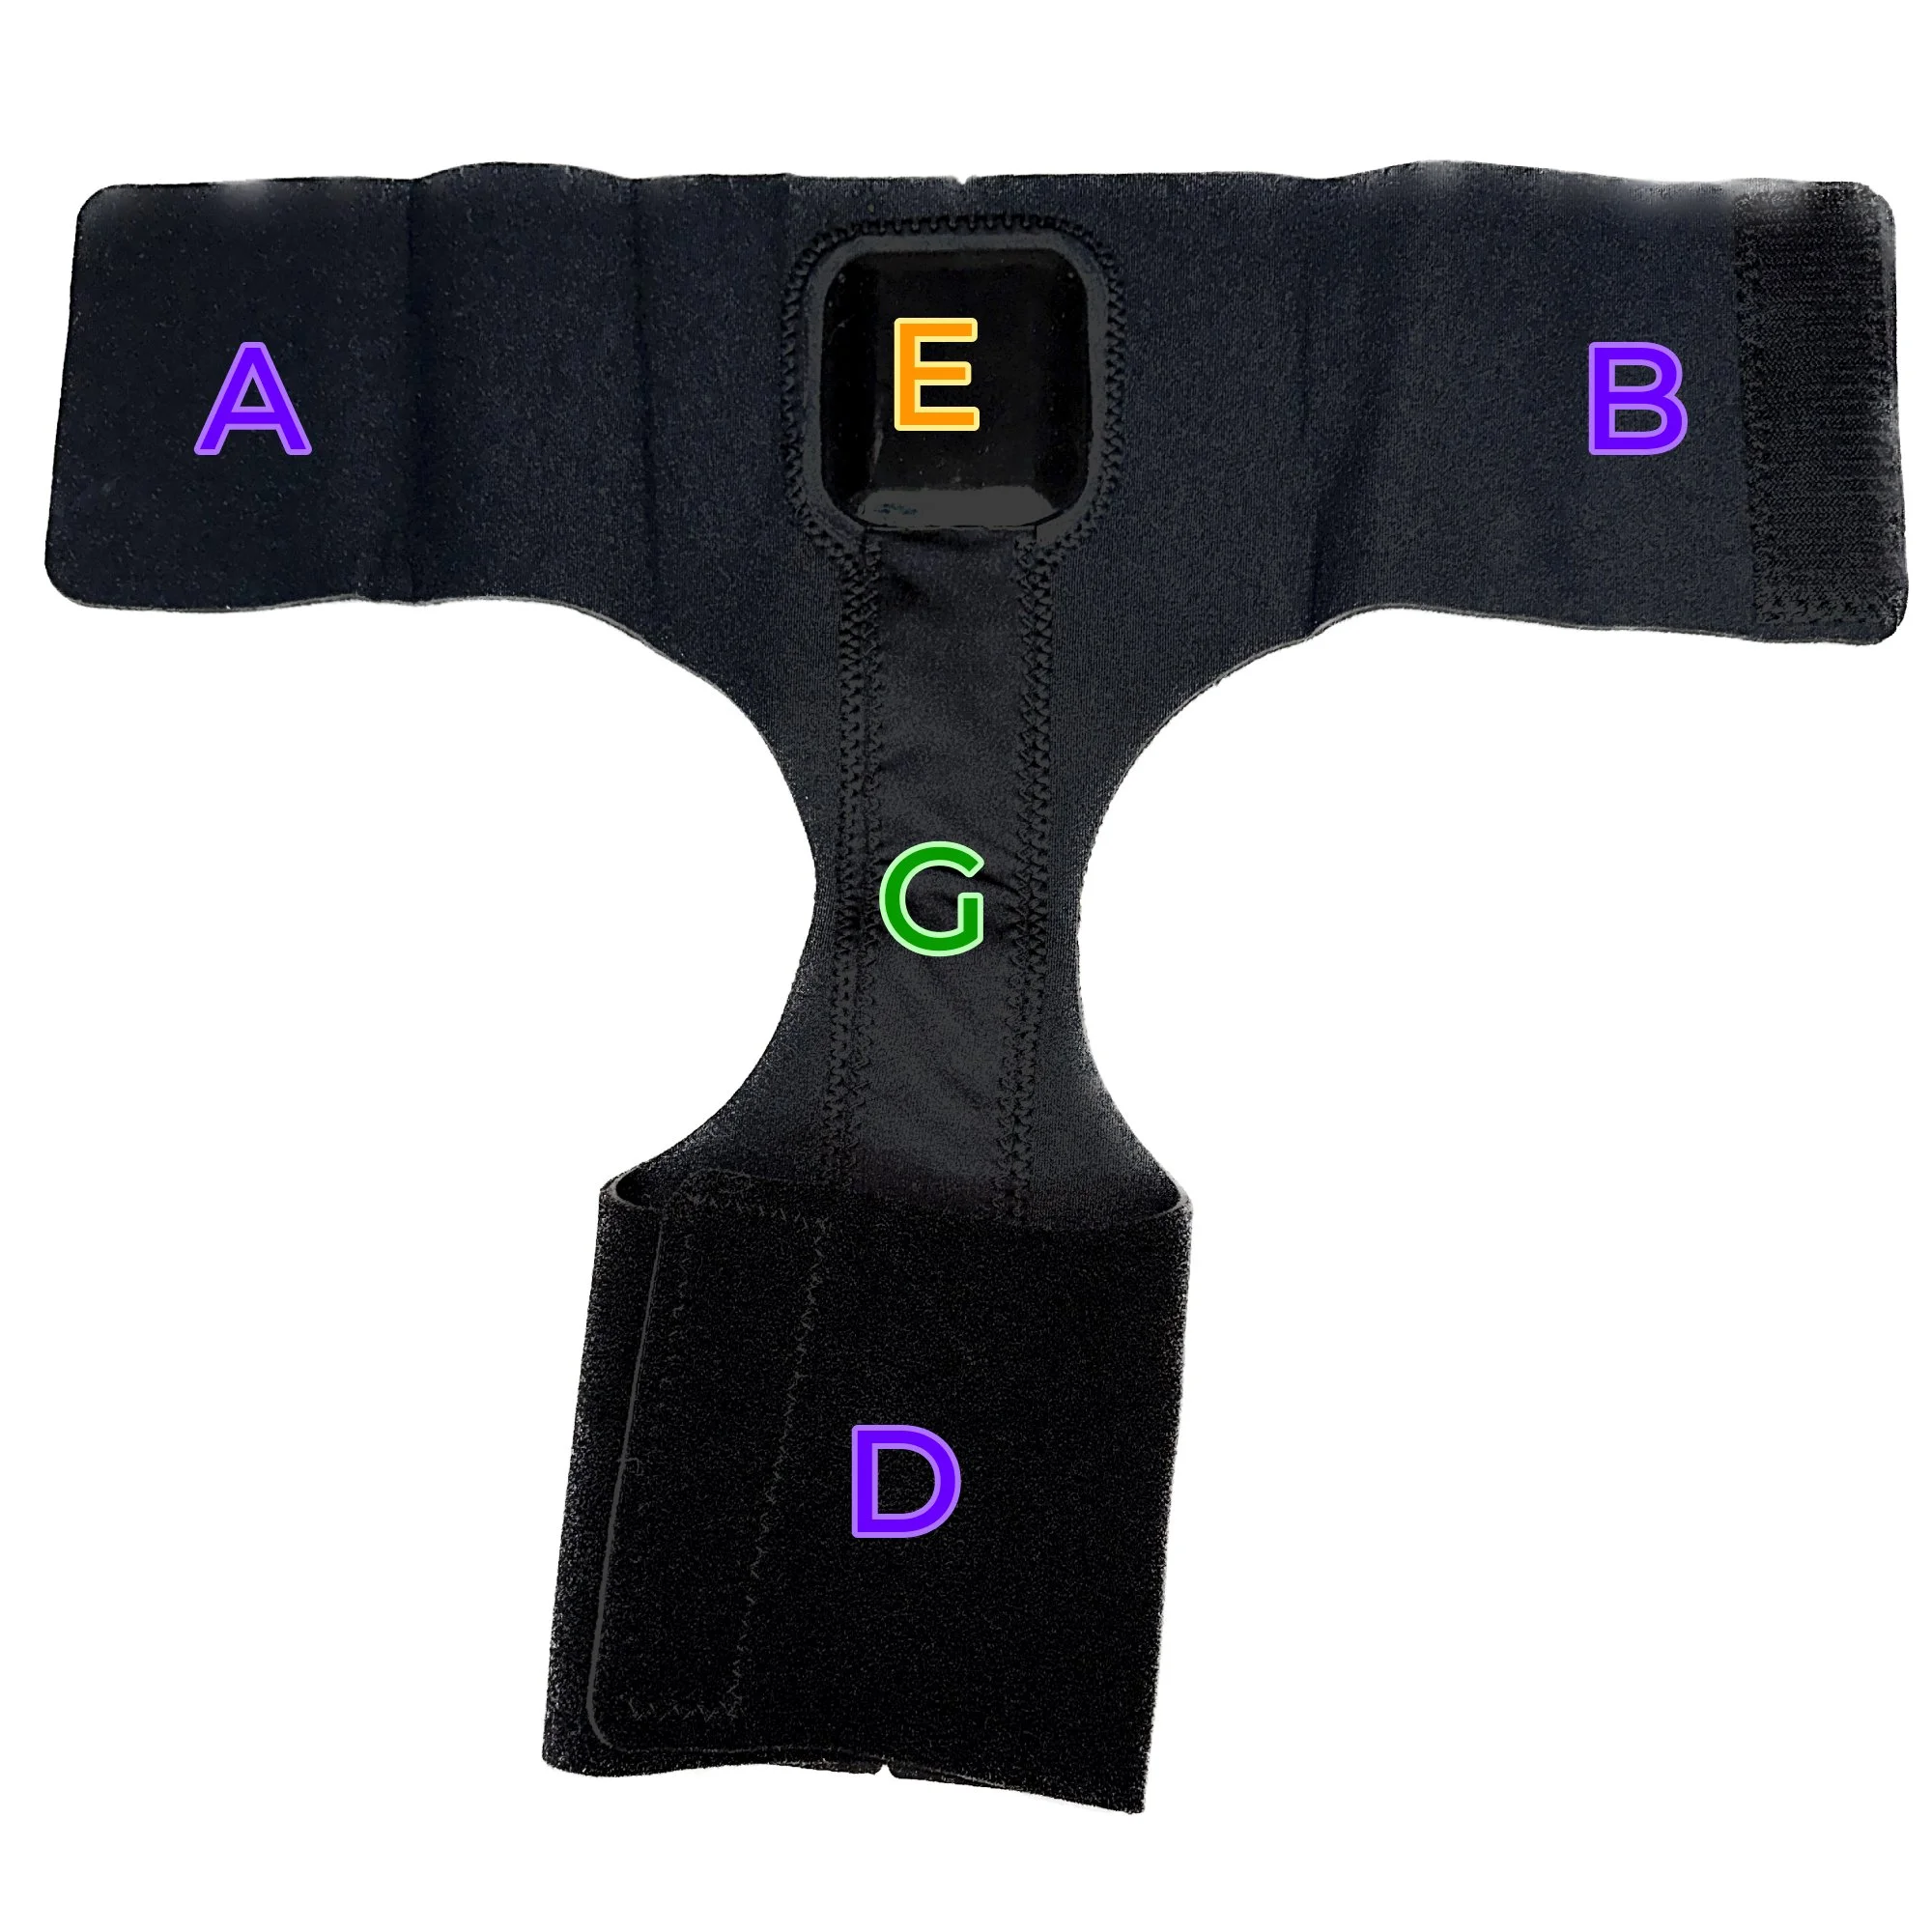
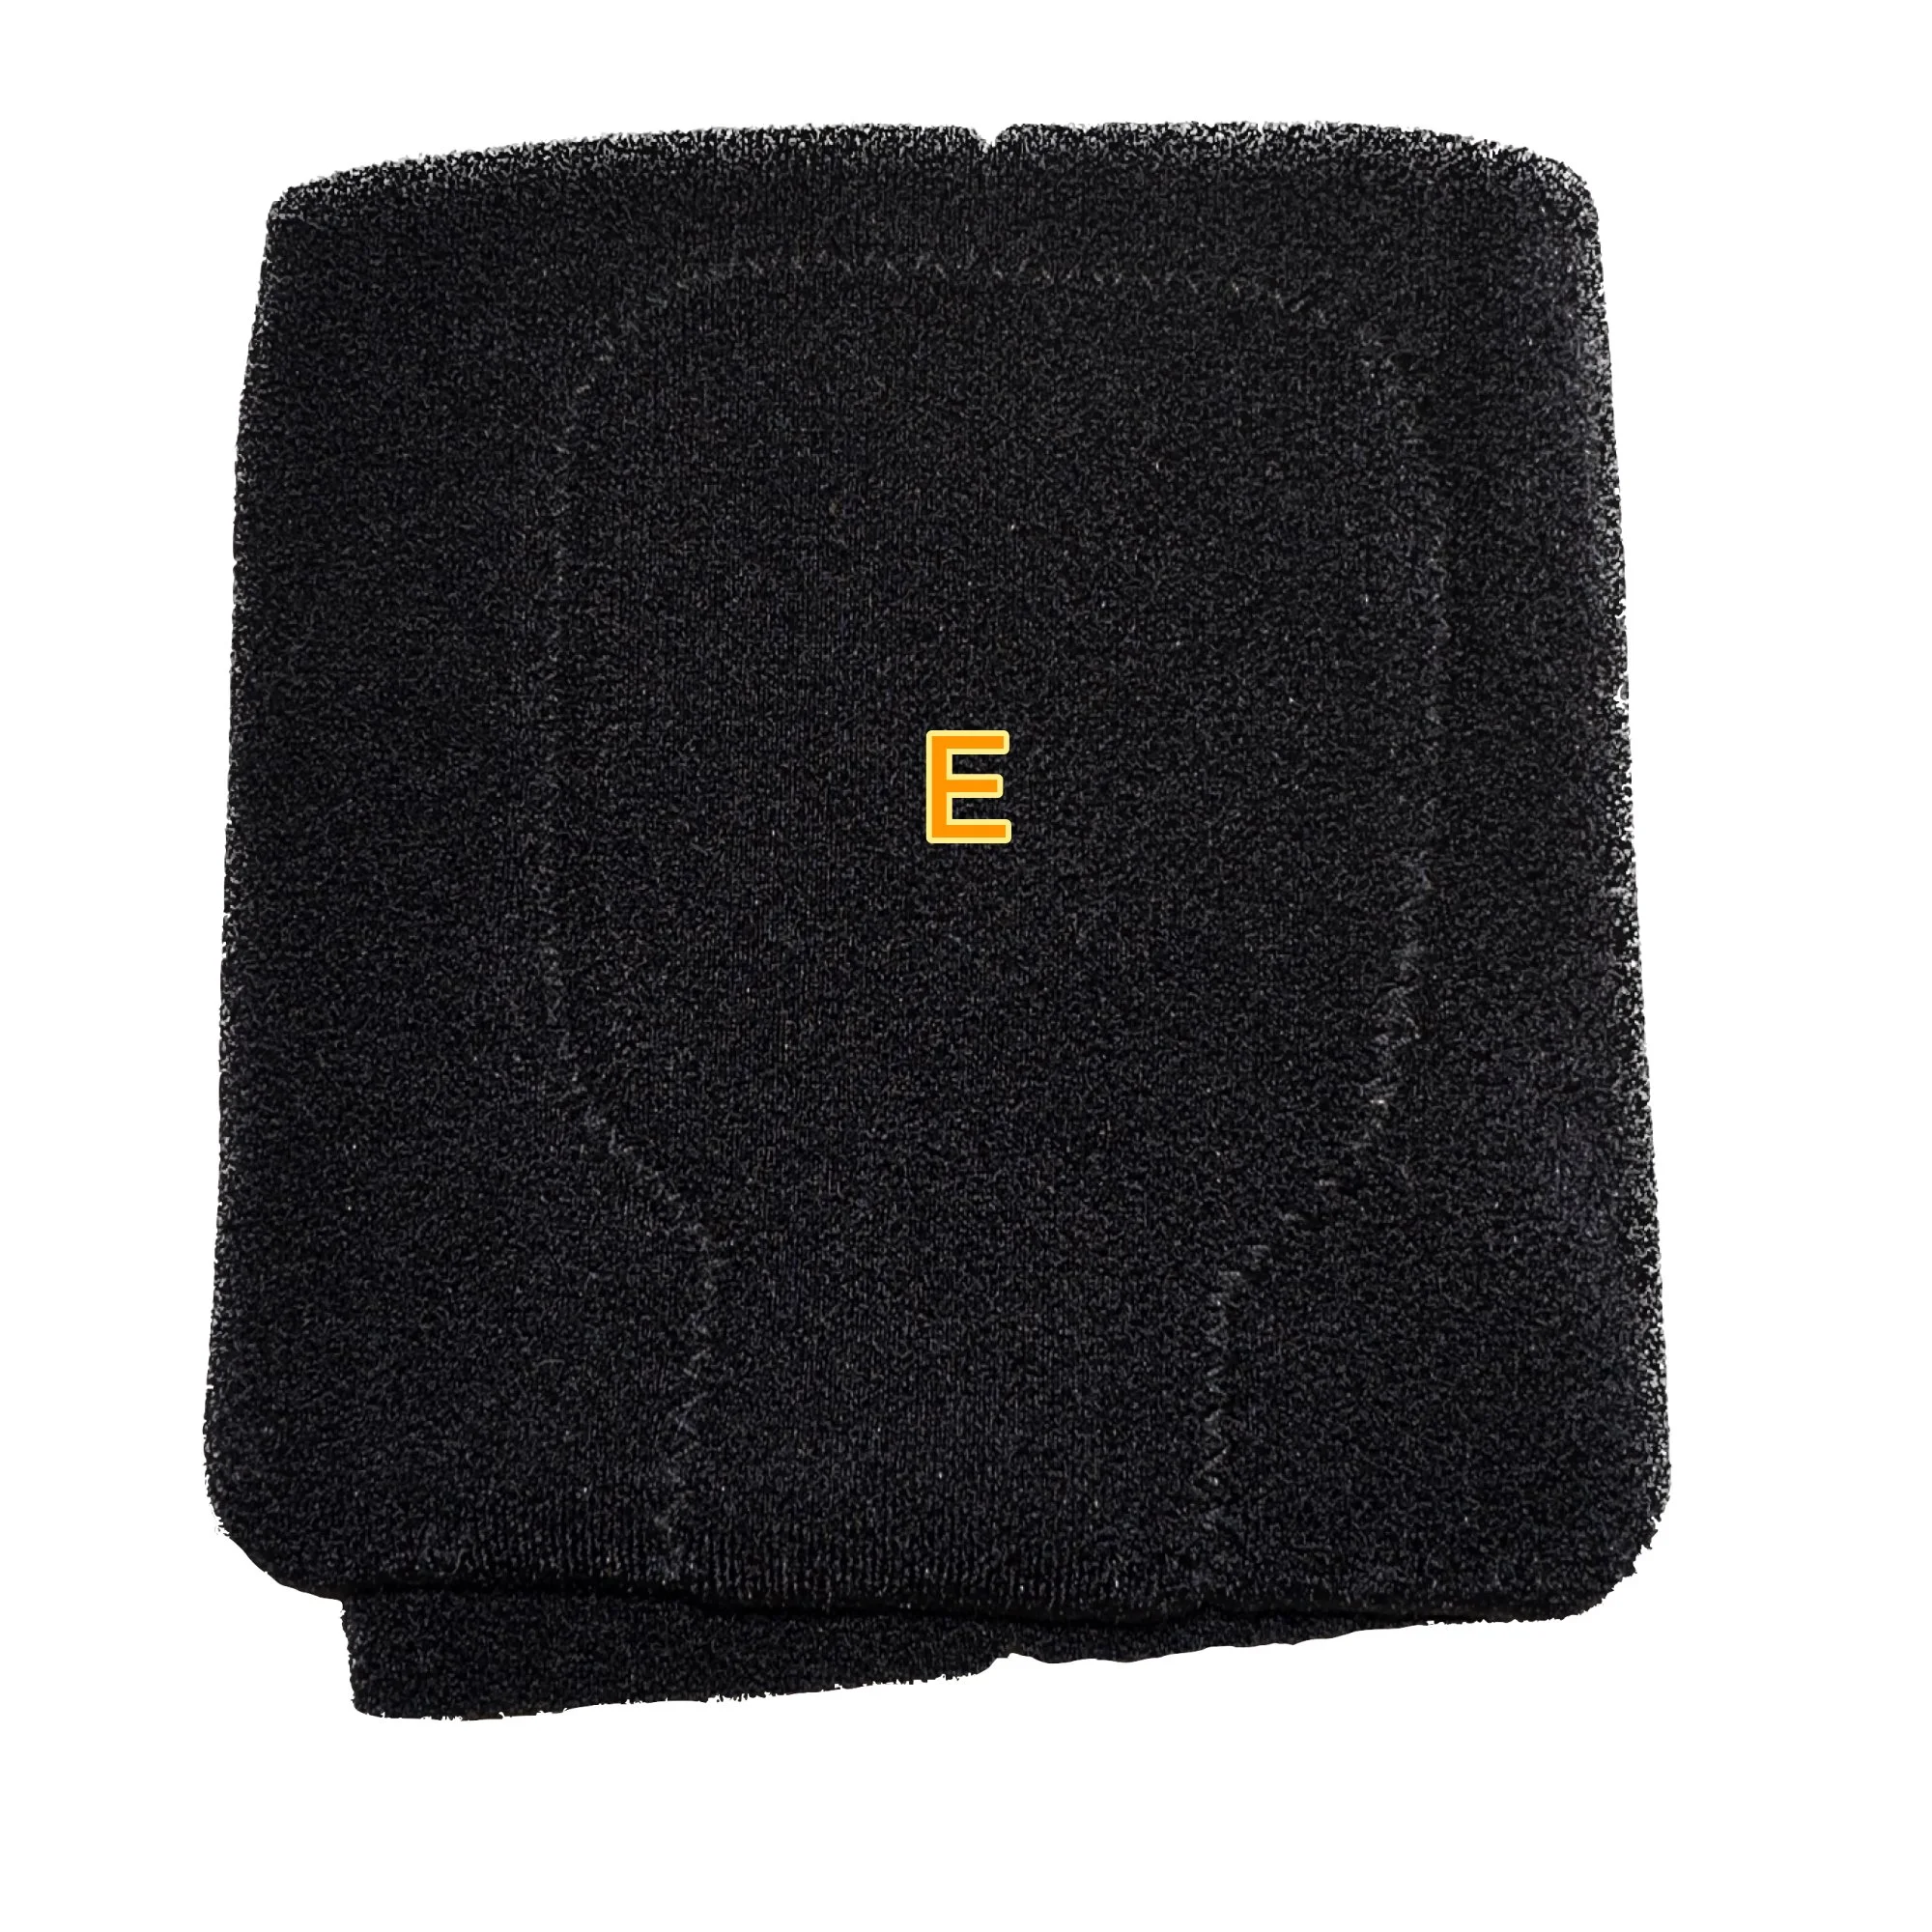
1. Place the sleeve on a flat surface with the fuzzy side down, as pictured here with straps A, B, C, and D, sensors E and F, and mid-section G.
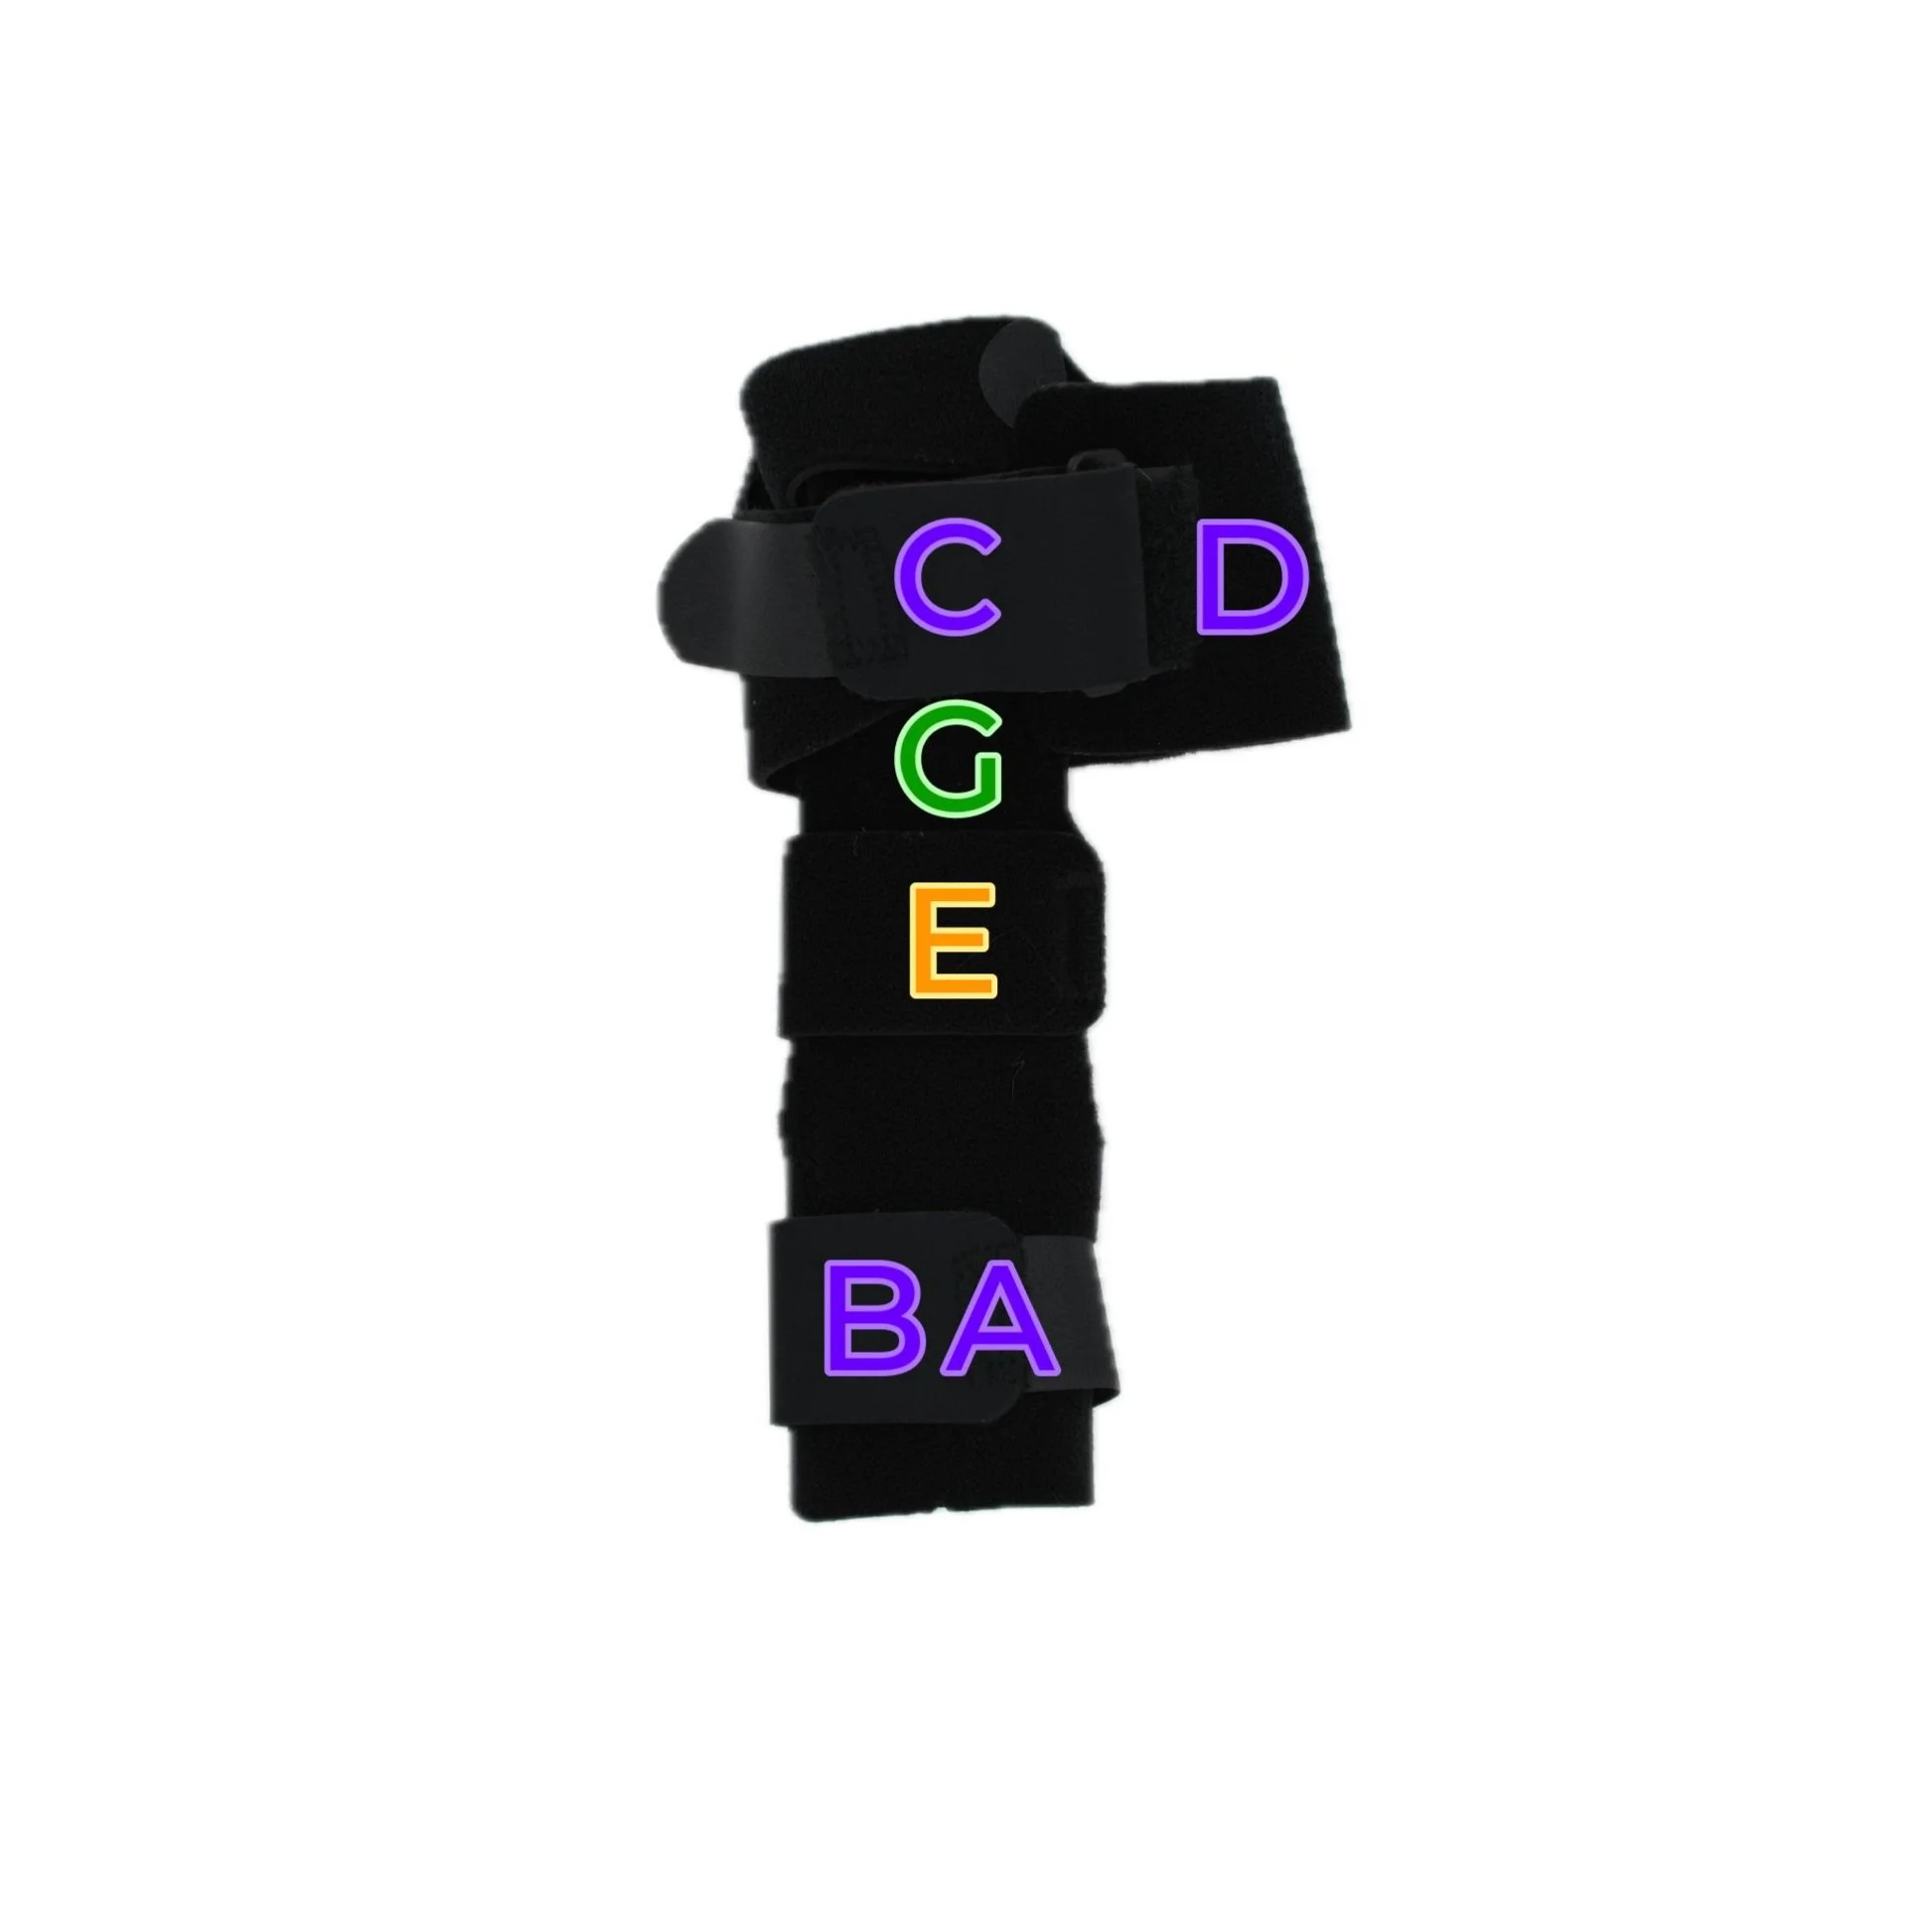
2. Fold strap C to sensor F.
3. Fold strap D to the back of strap C and secure.
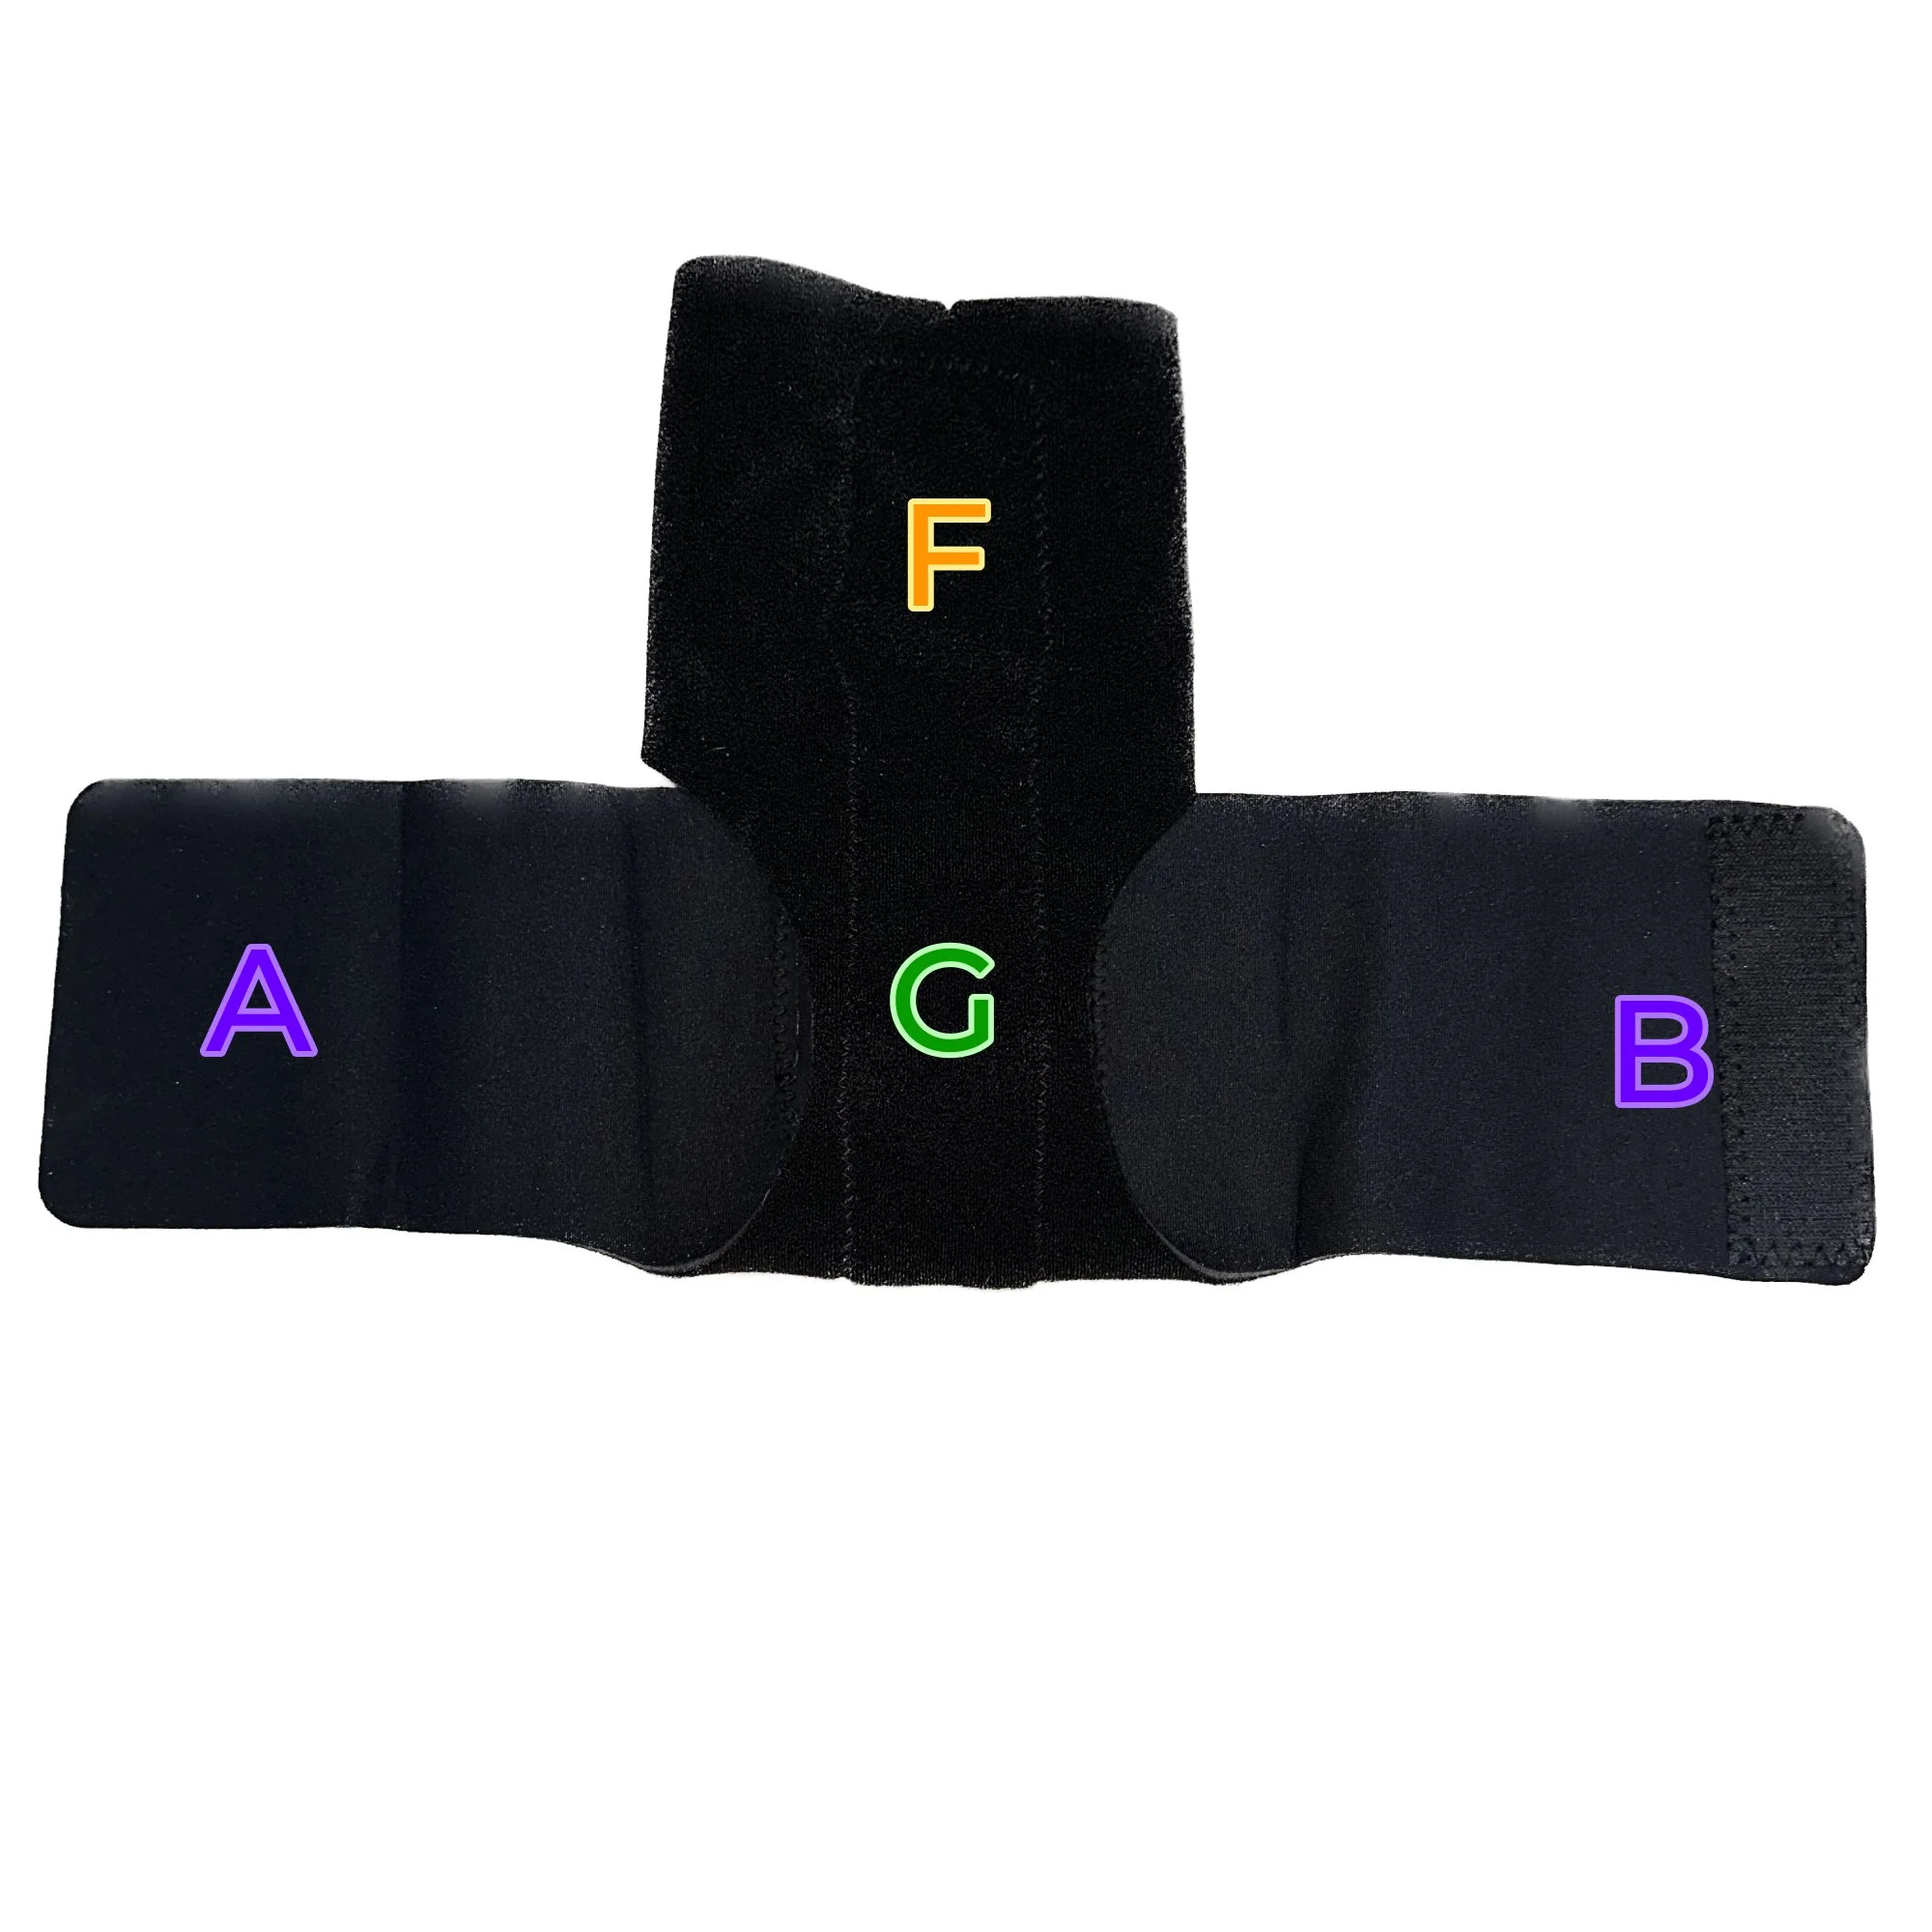
4. Fold the sleeve up just above the mid-section G, so that G sits on top of sensor F.
5. Fold sensor F back on itself so the mid-section G sits in between itself and sensor E.

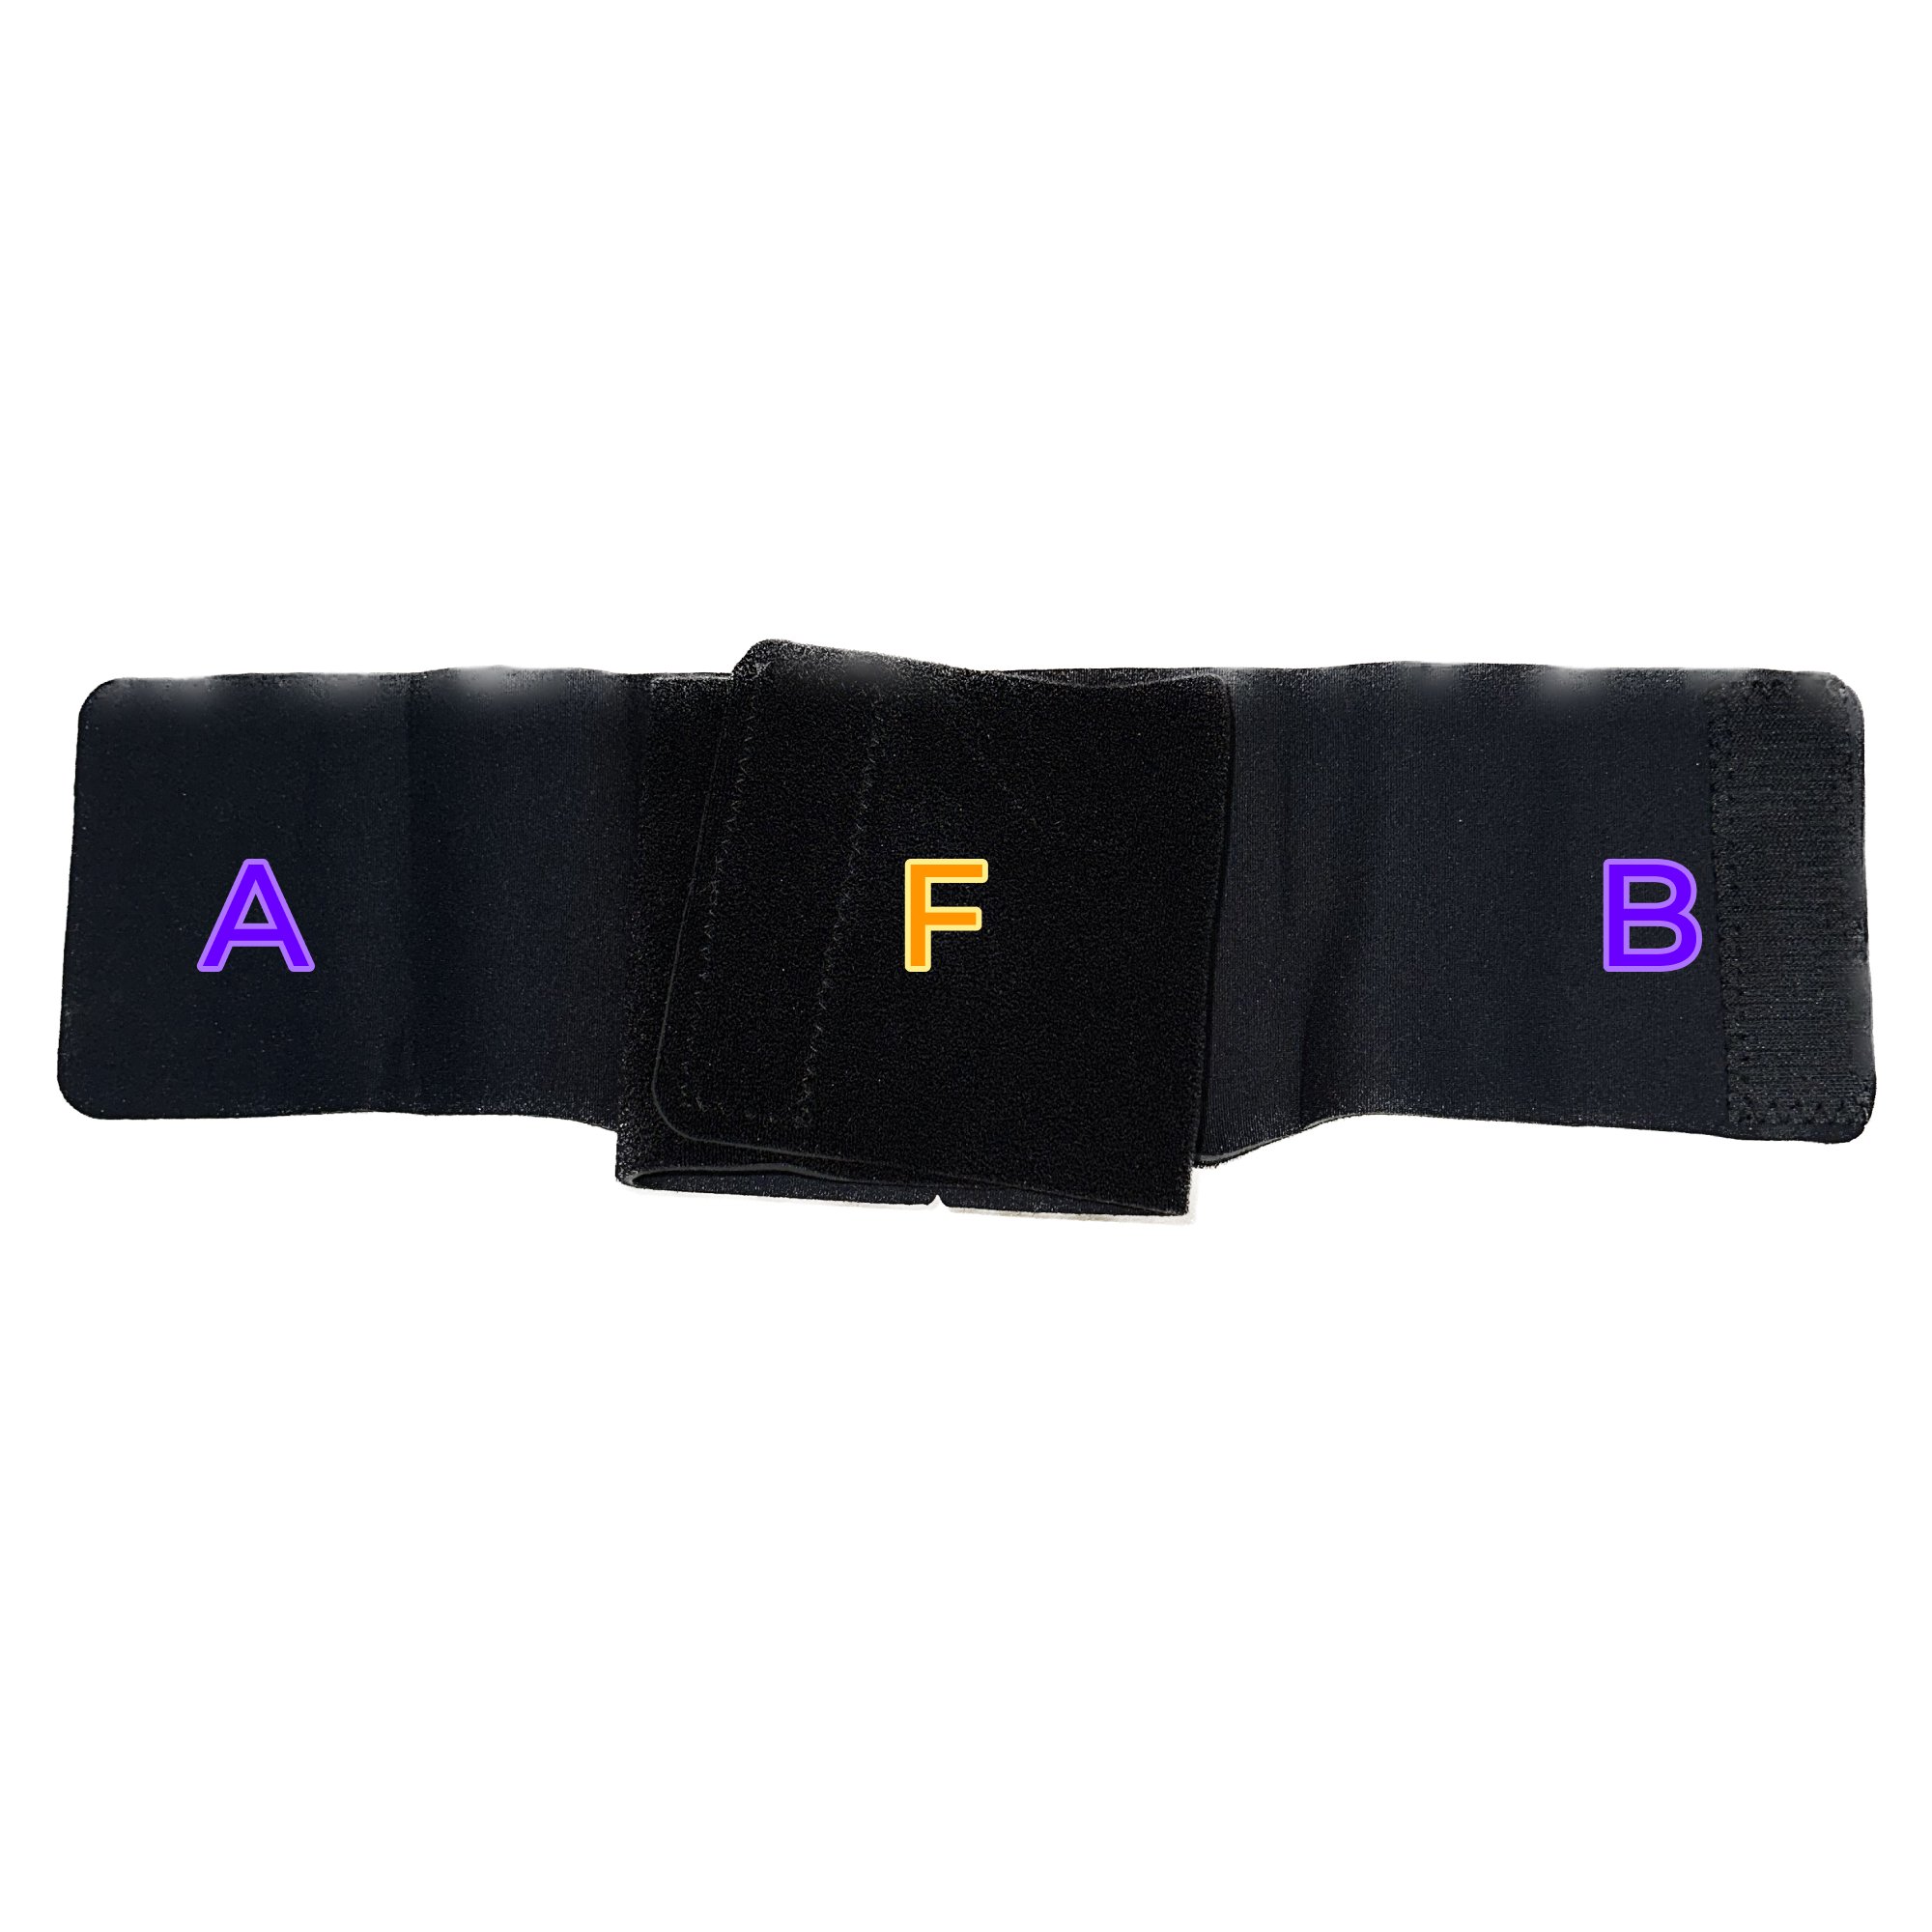
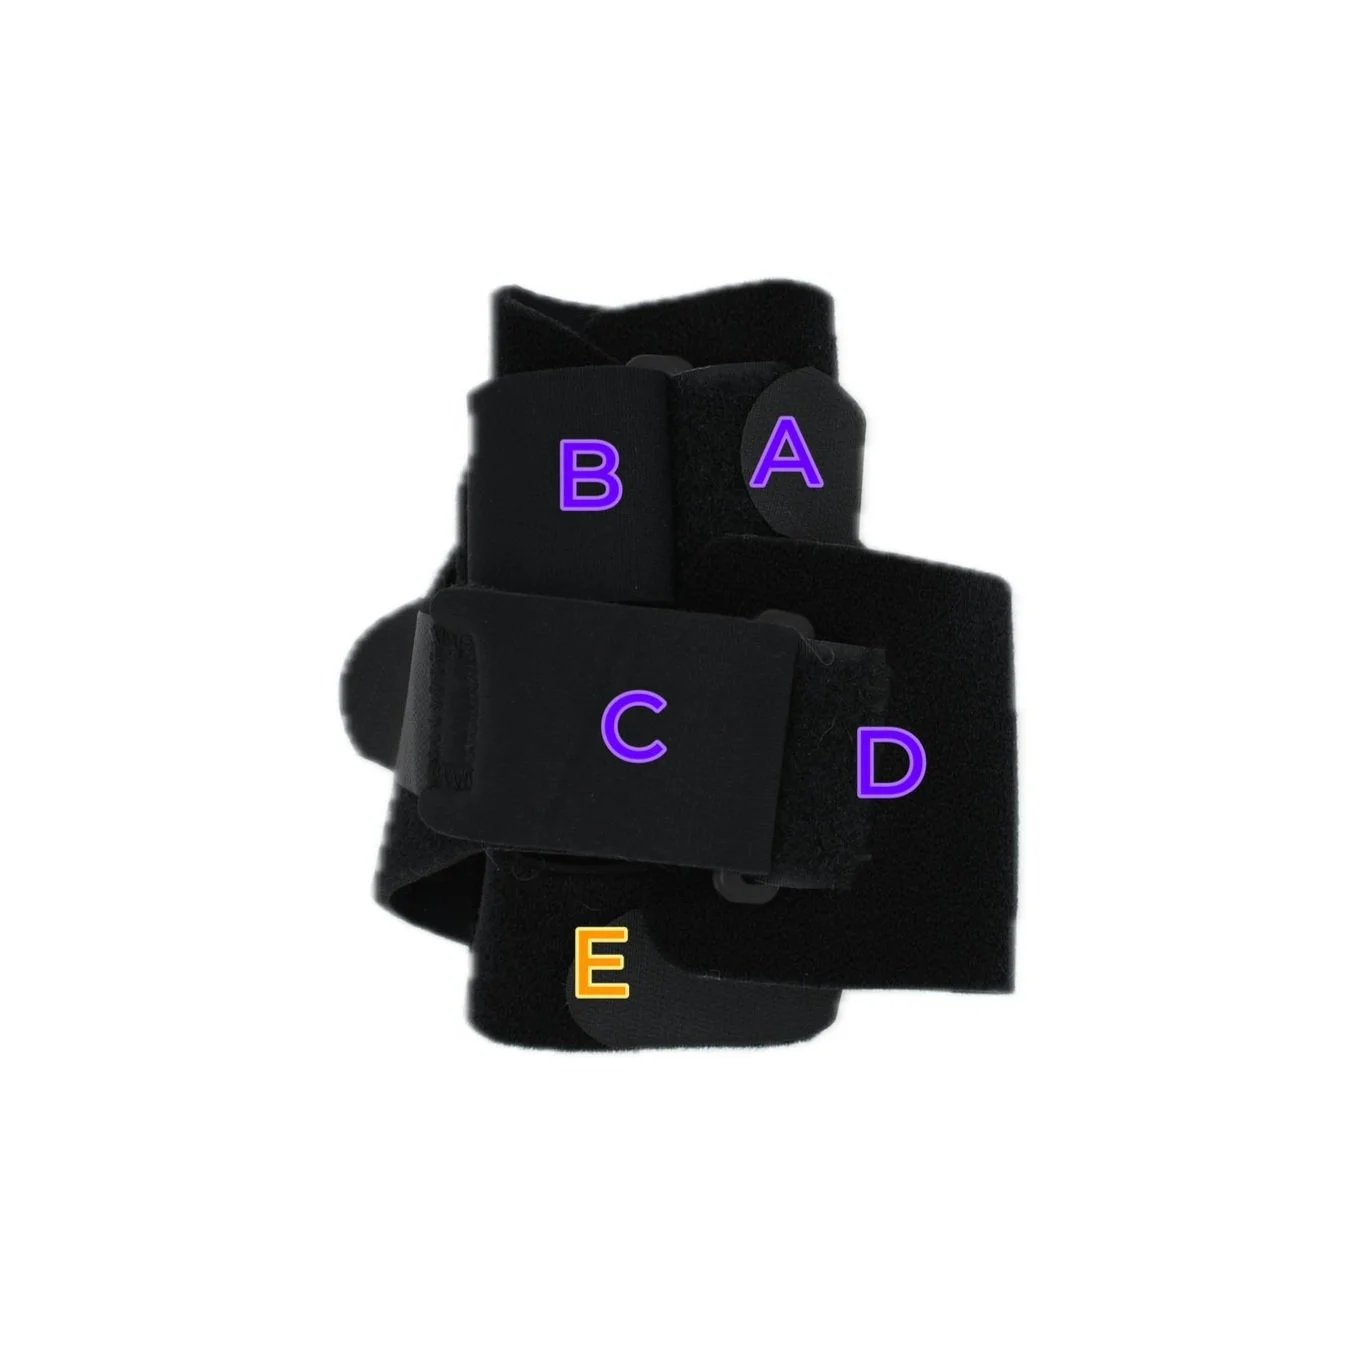
6. Fold strap A on top of sensor F.
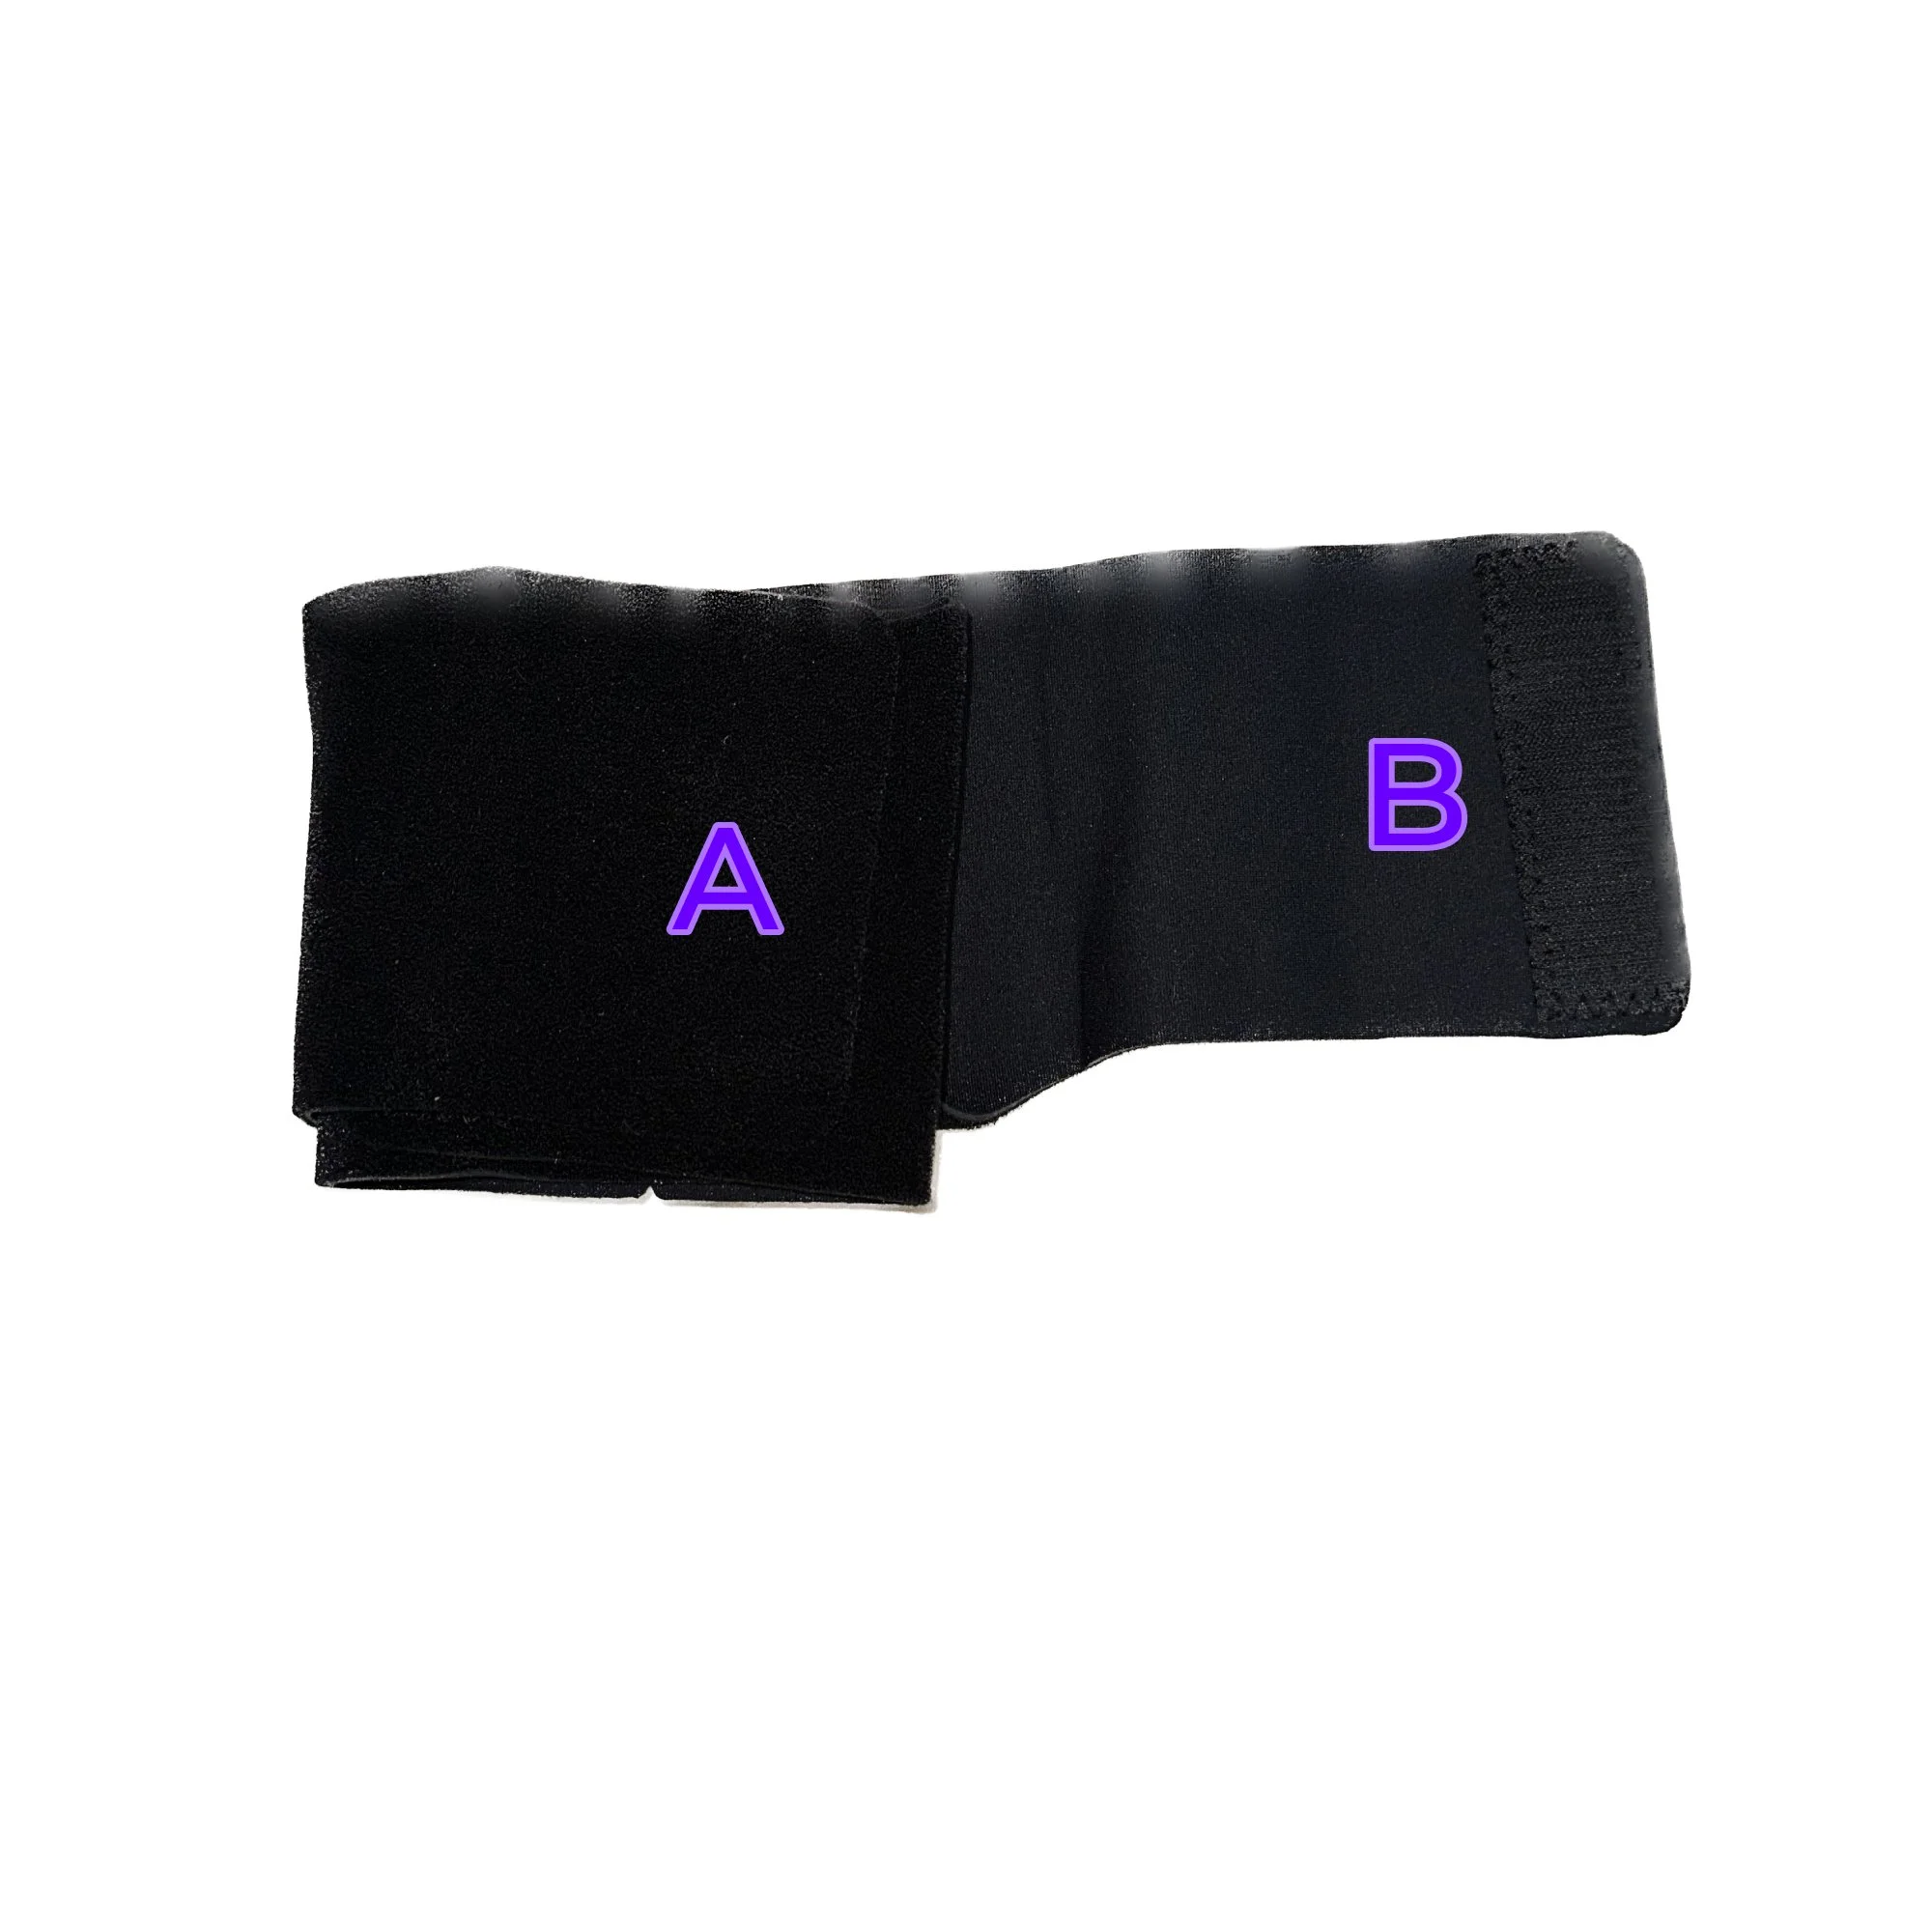
7. Fold strap B on top of strap A.
8. Flip the sleeve over and locate the charger pack outline on the bottom of sensor E.
9. Place the folded sleeve on to the charging pad with the charger pack outline touching the charging pad, as pictured here.
You’ll know the sleeve is charging when the blue LED light on the charging pad is illuminated and solid. If the blue light blinks or turns off, the sleeve may be placed incorrectly on the charging pad. Adjust its position until you see the solid blue light.
Help Charging
For other issues or help charging, please email help@openmotion.ai and describe your issue in detail. We will respond to you within 24 business hours.